Why CMS server?
CAYIN SMP players are high-performance multimedia players with extremely useful remote management functions. As a standalone device, SMP is already a powerful digital signage player. You might ask why you need to use a CMS server? Here are three reasons to set up a client-server network.
- You need to manage a large number of media players and divide them into groups. Using a CMS server allows you to update contents, edit playback schedules and modify configurations centrally and more efficiently.
- You cannot access SMP’s web manager directly over the network. For example, the SMP player is behind a firewall or doesn’t have a static IP address.
- You need to create more than one user accounts and each account is authorized to different user rights.
Before getting started
In this article, we will show you the way to connect a SMP player to a CMS server. Once the connection is established, the SMP player can get media files from the CMS server. However, content distribution (from CMS to SMP) does not mean content playback. To receive scheduled playlists from the server and start the playback, please follow steps in the document : Use Central Scheduling to synchronize playlists.
- If you have files copied in the player and then enable content update from a server, your files will be wiped out on the player side as the contents in the folder on the server will synchronize with the hard drive of the player. Therefore, if you want to edit SMP player's media folder manually, please DO NOT enable the function, content synchronization.
- To prevent some media files from deleting by the server while you update the content of SMP automatically from CMS or a web server, you can create a folder named protected and keep your files in that folder.
- Please open Port 80, 20000 (TCP) if you are using a firewall.
Basic connection setup: CMS server
You need to create an account, a group, and a folder in the CMS server. The account should be authorized to access the group. The system will verify the username and password when SMP and CMS synchronize contents.
STEP 1 :
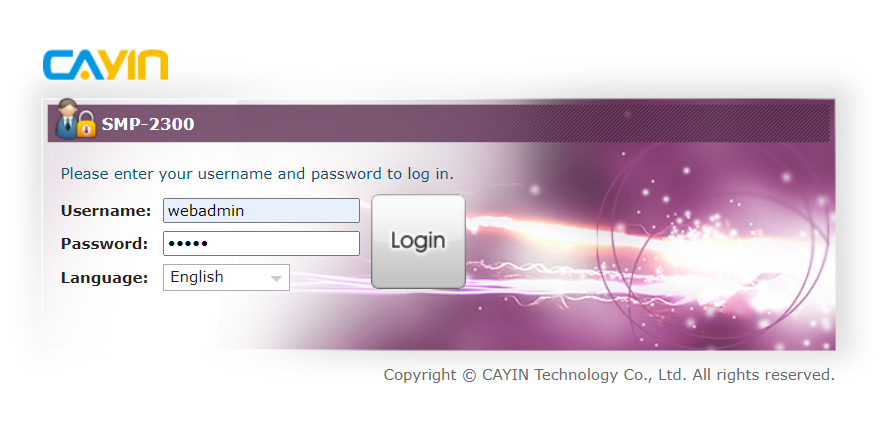
Log in CMS Web Manager. Enter your username and password and select the language display for your user interface. Then, click Login.
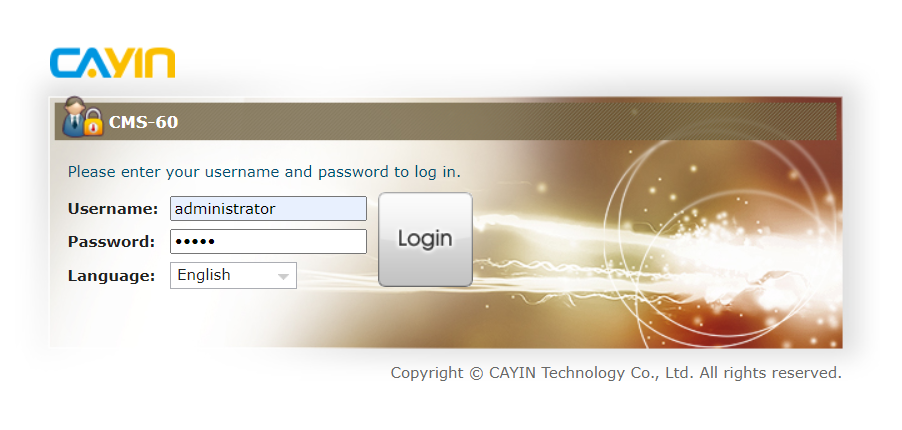
If you don’t plan to log in as the default administrator, please make sure the user account you use to log in is authorized to access the function: Access Control. (Refer to STEP 6)
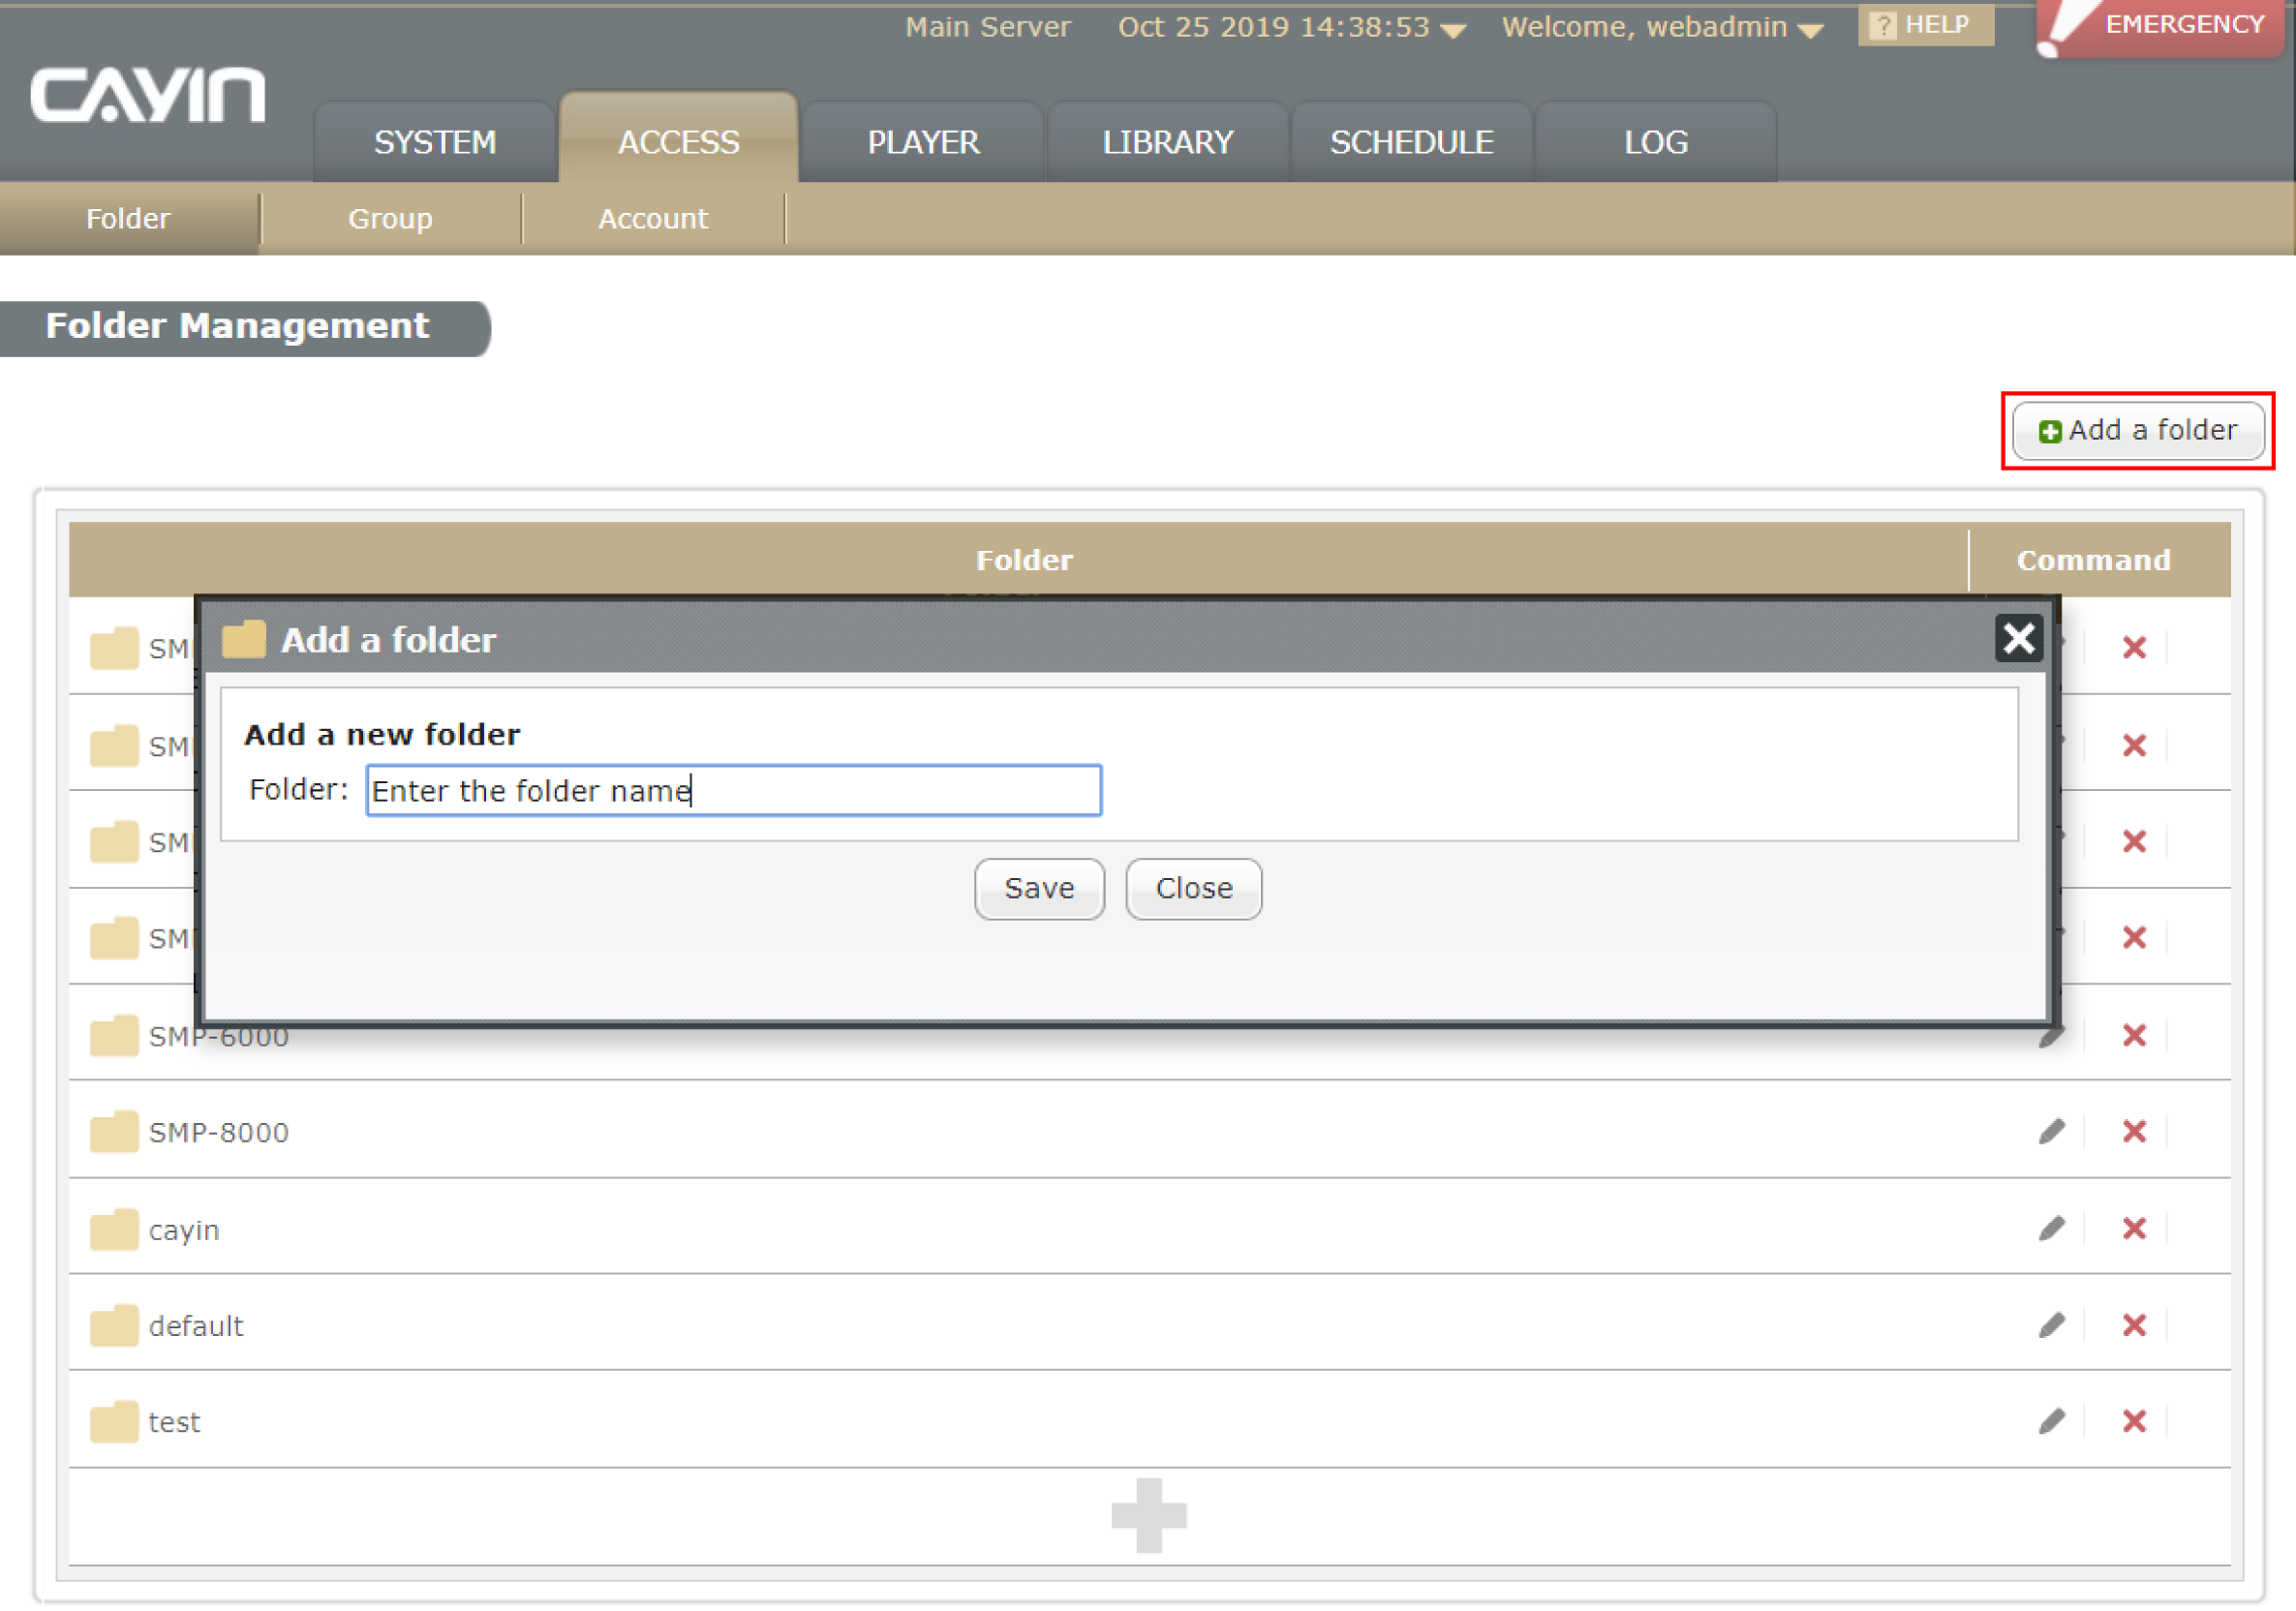
STEP 2 :
Go to ACCESS > Folder. Click Add a folder, enter a folder name, and click Save. Then, this folder will be created in the Hard Diskof the server.
STEP 3 :
Go to ACCESS > Group. Click Add a group, and you will see a pop-up window. Enter a group name in the Group Name box and link the group to the folder you just created in STEP 2. Then, click Save to complete the procedure. Once linked, SMP will synchronize the content in the folder associated with the group.

STEP 4 :
If you don’t want to use the account “administrator” to manage SMP, you can create an account to do different managerial jobs. Go to ACCESS > Account. Click Add account and you will see a pop-up window. Enter an account name and a password. Enter the password again to confirm it.
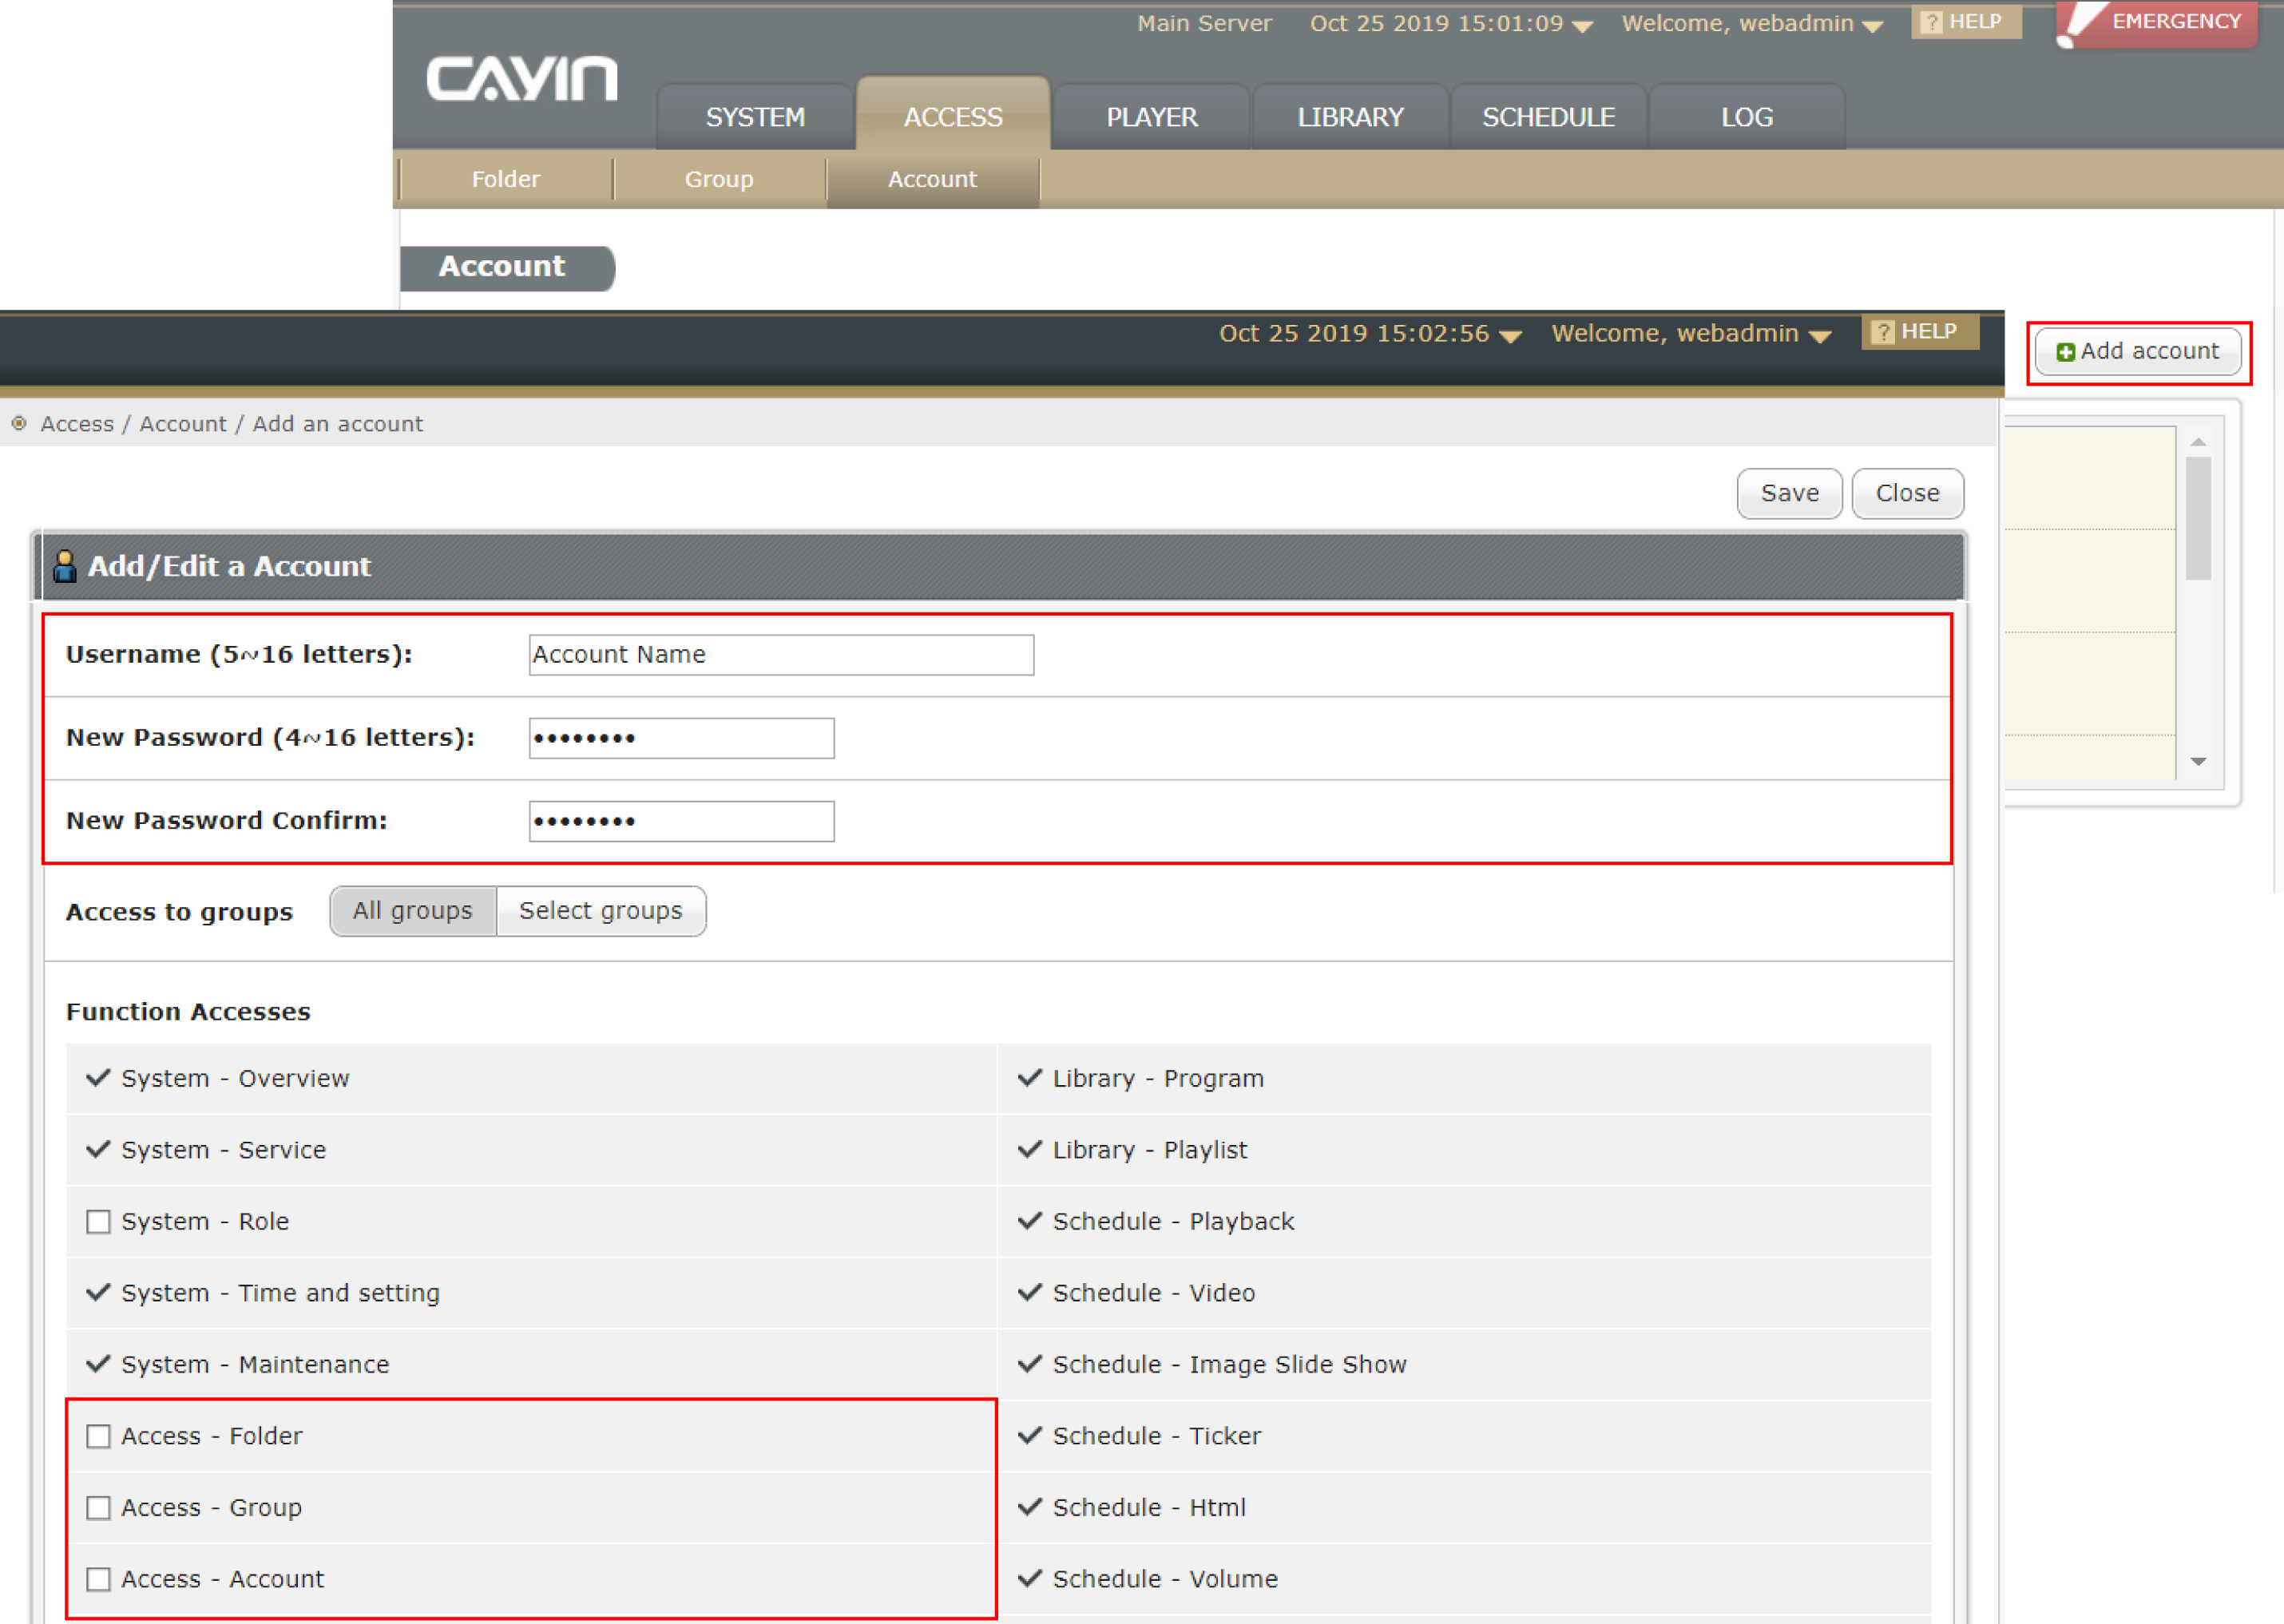
STEP 5 :
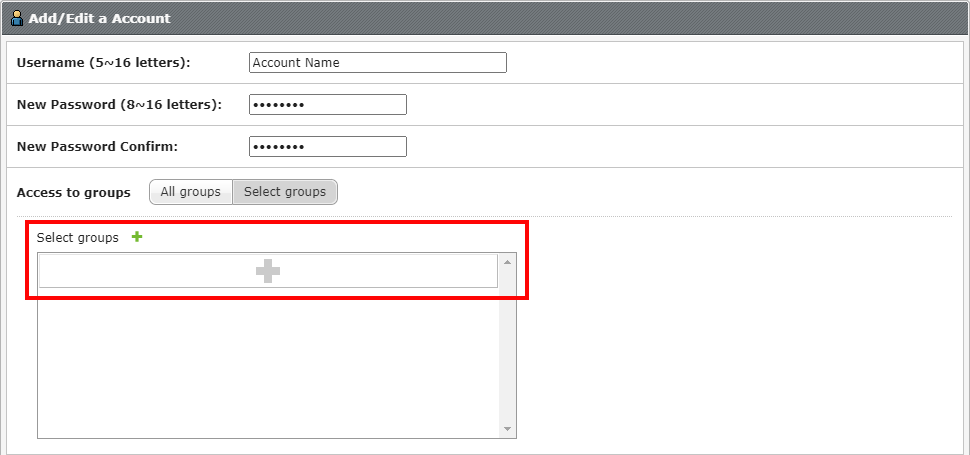
In the Access to groups area, you can assign the management authority of groups to this account. If you authorize this account to manage all folders in this CMS server, please select All groups.
If you want this account to manage only selected folders, please enable
Select groups and click on ![]() or
or ![]() to add groups. Make
sure you include the group you just created in STEP
3. This account can only manage those folders which are in the
Selected Groups.
to add groups. Make
sure you include the group you just created in STEP
3. This account can only manage those folders which are in the
Selected Groups.
STEP 6 :
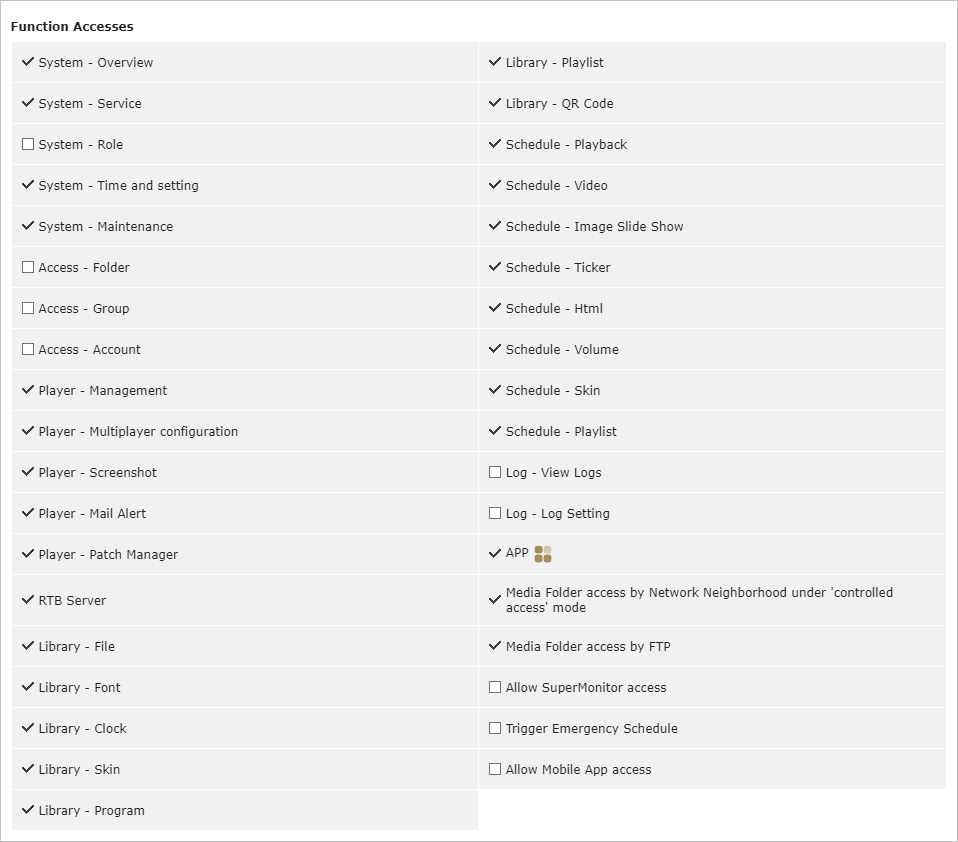
In the Function Access area, you can authorize management activities for this account. You can select any function you might need depending on the actual usage conditions. However, we suggest you create two kinds of accounts for safety:
-
Account to synchronize content:
You can create an account without enabling any function. Then, users with this account will not be able to log in the Web Manager. However, SMP players with this account can still synchronize content with the CMS server. Please fill in the exact username and password of this account on SMP’s configuration page. Please refer to STEP 3 in the next paragraph: Basic connection setup: SMP player.
-
Account to access Web Manager:
You can create another account and use it to log in CMS Web Manager to handle daily operations. Just enable those functions this account is authorized to access. Those items listed in Function Access are in accordance with the main and sub-management modules in CMS Web Manager.

The interface of CMS-SE main management modules

The interface of CMS-SE sub-management modules
There are two additional modules:
- Trigger Emergency Schedule is an advanced function for
you to
broadcast emergency messages.

- SuperMonitor is the older version of CMS-PRO. Please enable Allow SuperMonitor access if you ever bought the software and want to use it to manage multiple CMS servers and SMP players simultaneously.
- Trigger Emergency Schedule is an advanced function for
you to
broadcast emergency messages.
Click Save and a new account will be created.
Now, you complete the basic connection setup of the CMS server. Please move on to configure SMP players.
Basic connection setup: SMP player
STEP 1 :
Log in SMP Web Manager. Enter your username and password and select the language display for your user interface. Then, click Login.
STEP 2 :
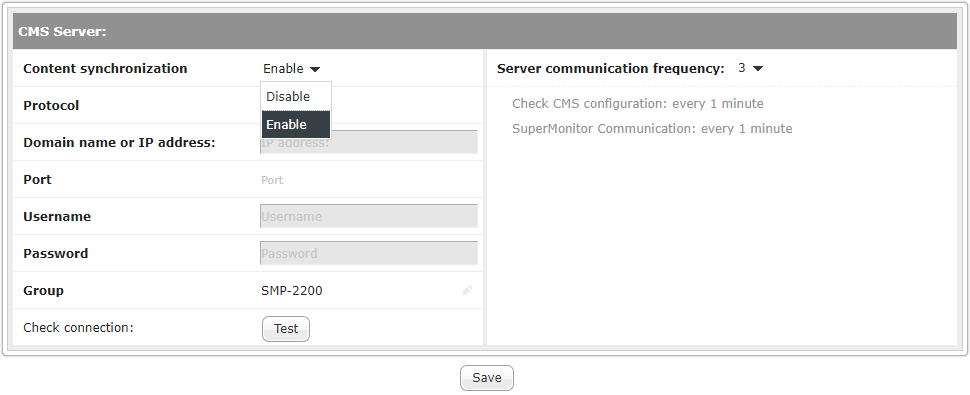
Go to CMS > CMS Connection. Select Enable to enable content synchronization.
STEP 3 :
You can set HTTP or HTTPS as the communication protocol between CMS and SMP. You can also set Auto; then, the system will apply HTTPS (port 443) first and try HTTP (port 80) later if it fails to connect via HTTPS. Please note that you have to make sure to enable HTTPS on CMS server (SYSTEM > Service > Port and Security) before you can select HTTPS as the protocol here, or the SMP player will not be able to update content and sync schedules with the CMS server.
Please enter the FQDN domain name or IP address of the CMS server to which this SMP player will connect. Then, select the communication protocol and port number and enter the exact Username, Password and Group name of the account, which you created earlier in the Basic connection setup: CMS server. Be aware that the system is case sensitive.
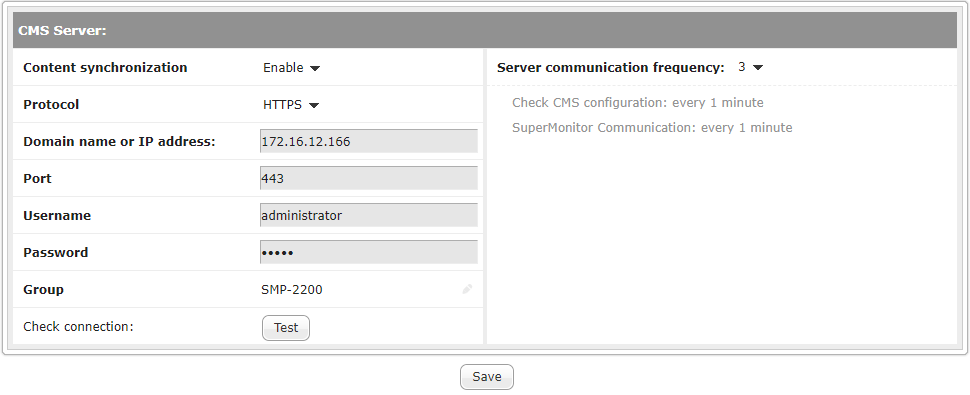
NOTE : To add more SMP players into any given group, you just need to give the same group name to those players. We strongly suggest that players should have different hostnames, or it would be hard for you to tell one from another.
STEP 4 :
After completing all settings, please click Test to check the validity of the Username, Password, Group, and IP address.
STEP 5 :
Adjust the frequency parameters for several SMP/CMS services. The frequency value is from 5 (Frequent) to 1 (Infrequent). If you don't need to check configuration updates from CMS to SMP frequently, you can lower the frequency and reduce network traffic.
(period per area)
(period every heartbeat)
STEP 6 :
Click Save to save and apply the settings.
Recheck your connection
There are two ways for you to see if the connection between CMS and SMP has been established successfully.
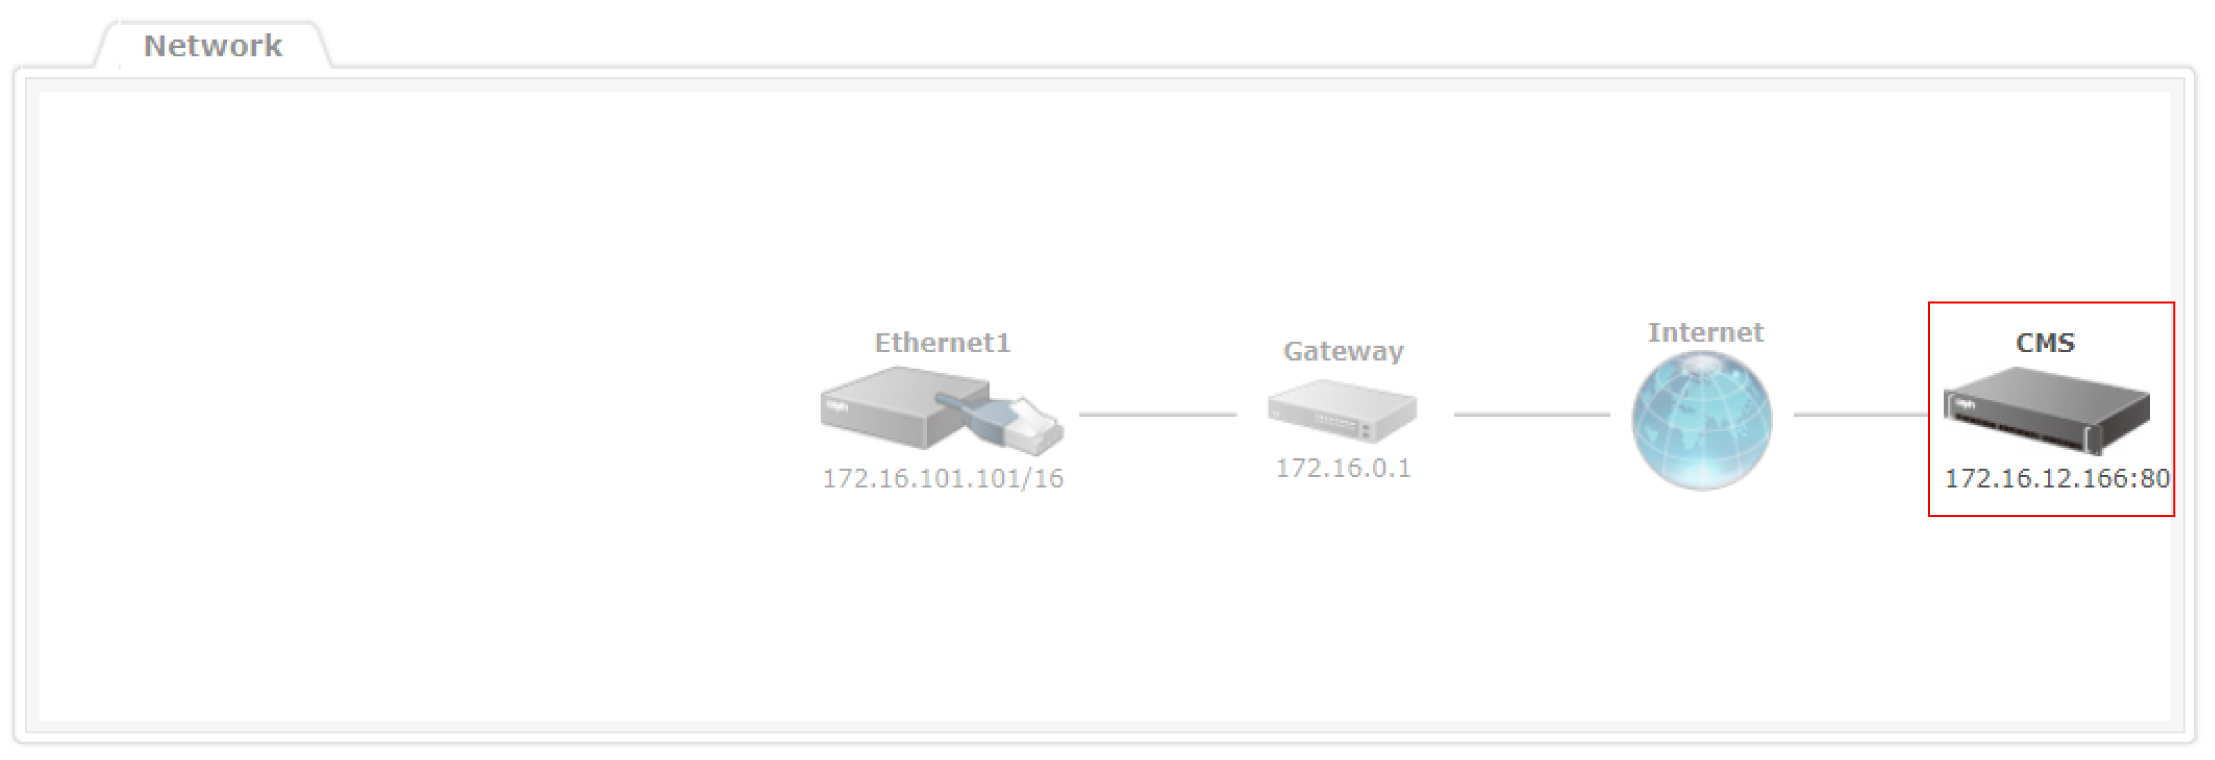
Check SMP’s network connection status
Log in SMP Web Manager and go to System > Overview. In this page, you can see network topology, indicating the network structure and IP address of each device, as well as the status of your network connection. There will be a CMS icon in the network diagram if this SMP player has established a connection successfully with a CMS server.
Check CMS’s player list
Log in CMS Web Manager and go to Player > Player Management. In this page, all SMP players that connect to this CMS server will be listed here. Click on a group to check all players in the group.
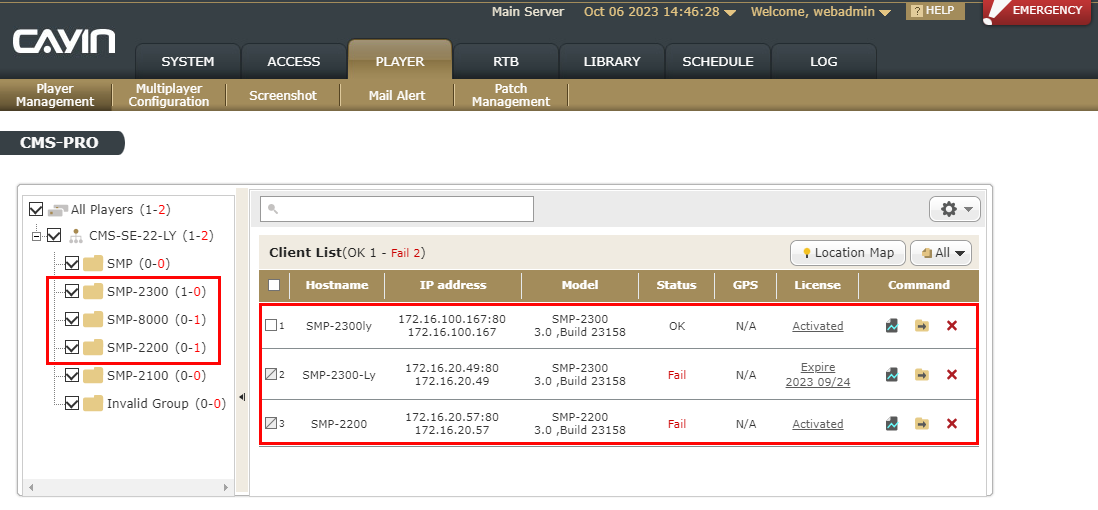
In the IP address column, you will see the IP address and Web Manager port number of each SMP player. If the SMP is deployed behind a firewall, the first IP will be the physical IP and the second one will be the virtual IP (the IP that SMP really owns). Other than the above situation, the first and second IP addresses are usually the same.
NOTE : Please make sure the CMS account which you use to log in has the right to access Player.
The maximum number of SMP players you can see here depends on the license you purchase. Go to System > Overview and check the License Manager section. In this figure, it shows the CMS canconnect and manage 250 SMP players.

Content synchronization setup: SMP player
If you wish to update SMP players' content automatically with a CAYIN CMS server, please proceed with the following steps after you finish the basic connection setup of SMP.
STEP 1 :
Log in SMP Web Manager. Go to CMS > Content Synchronization.
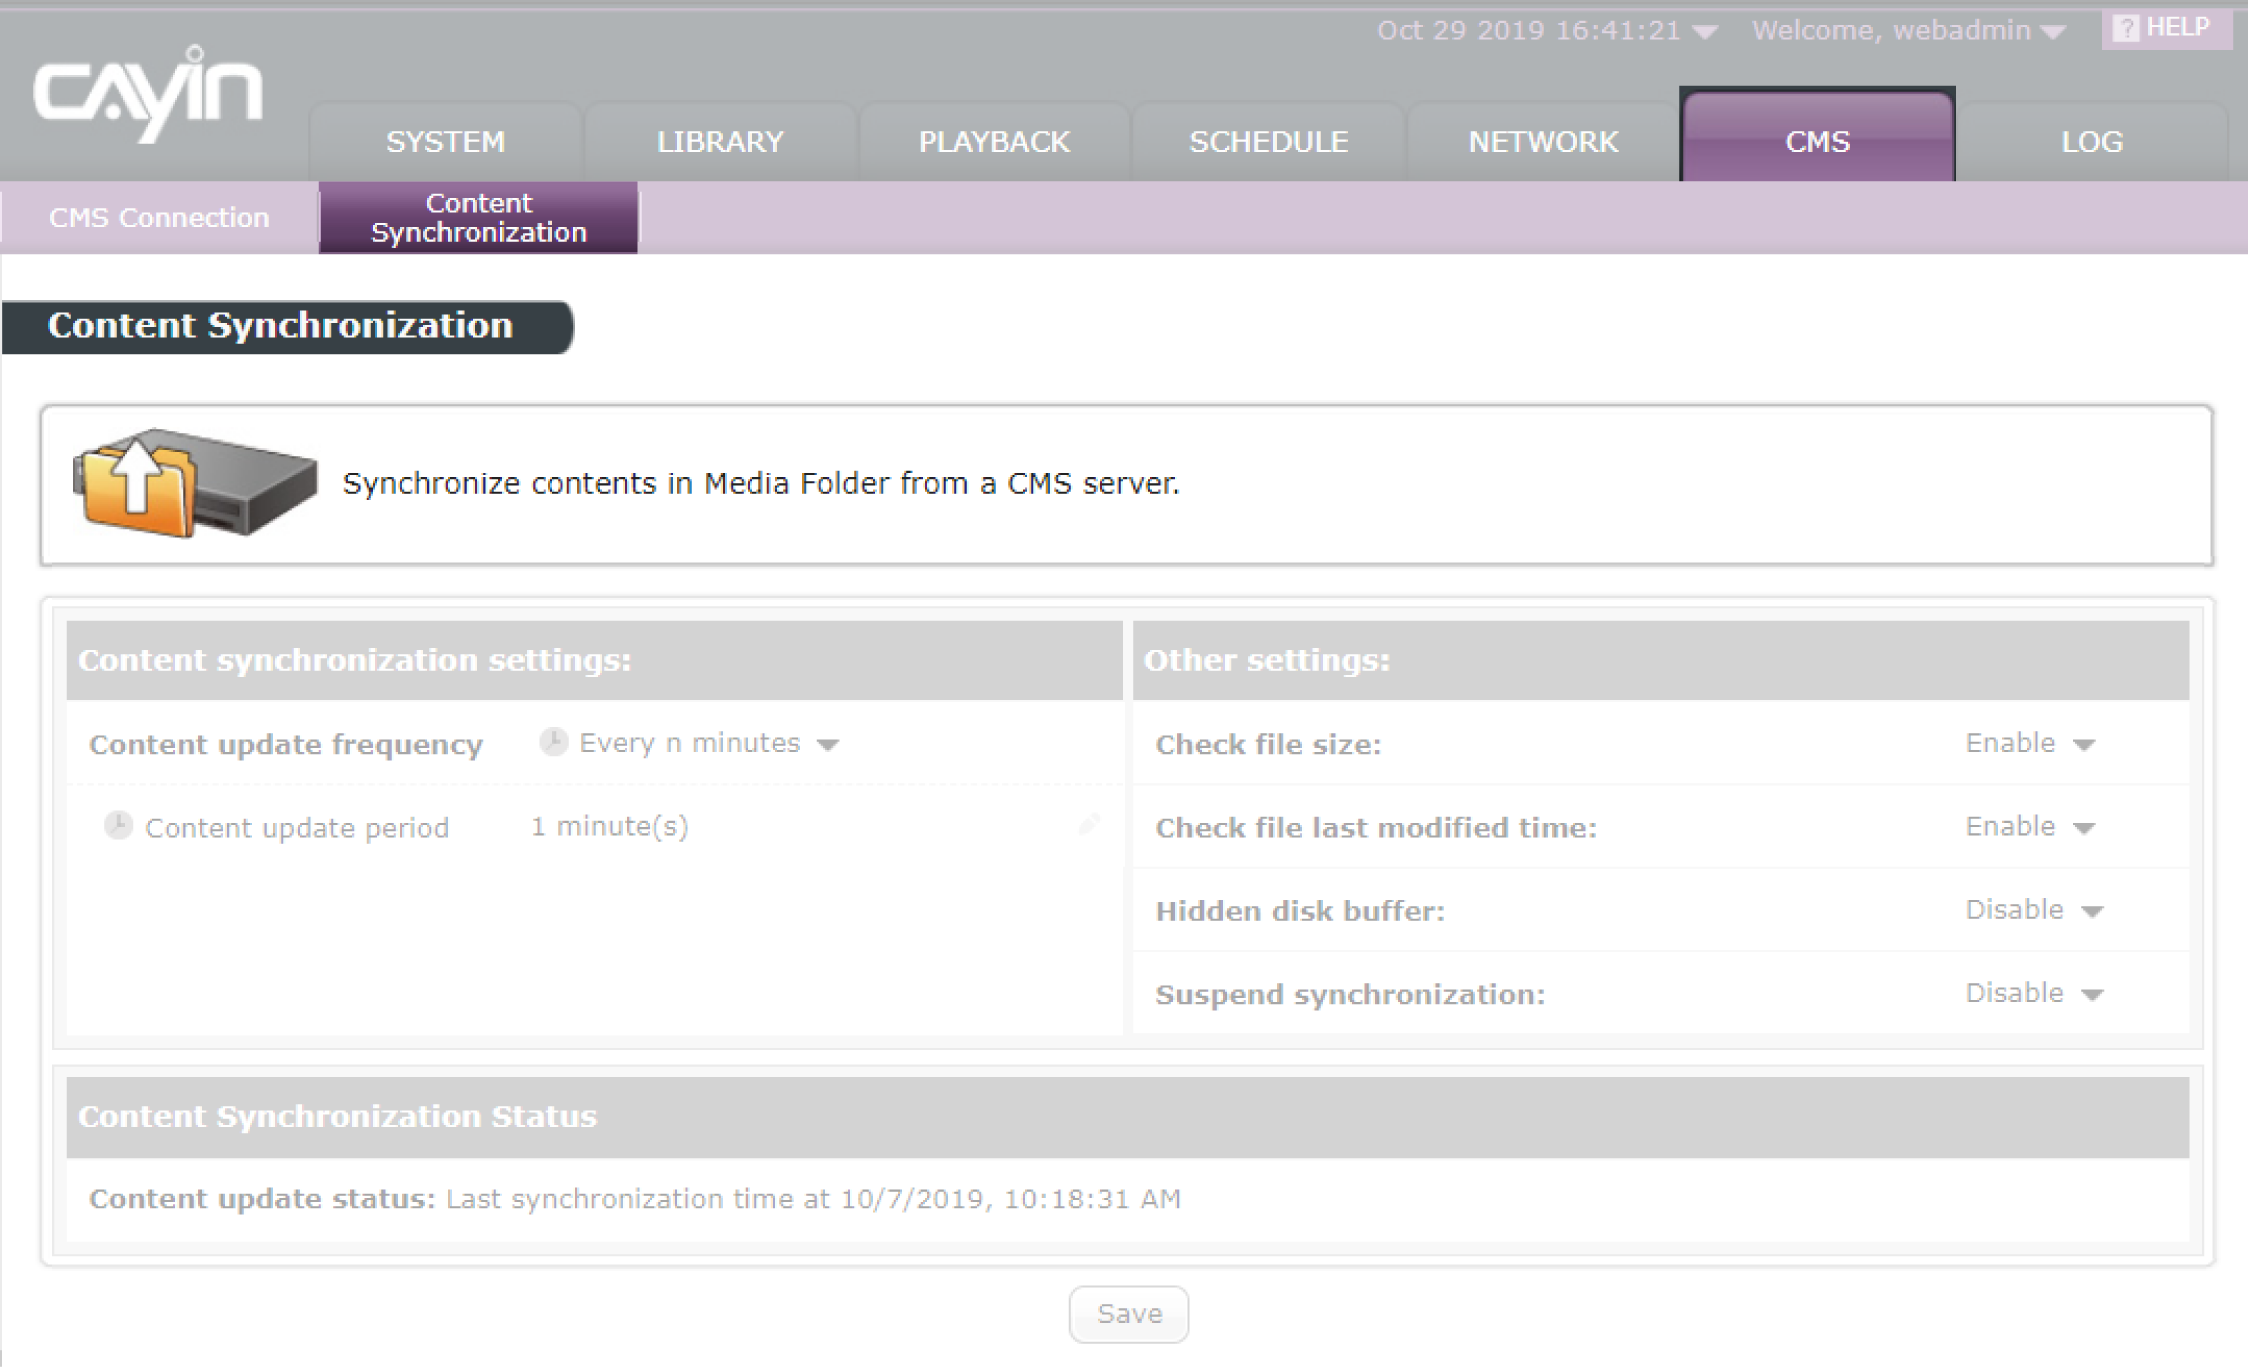
STEP 2 :
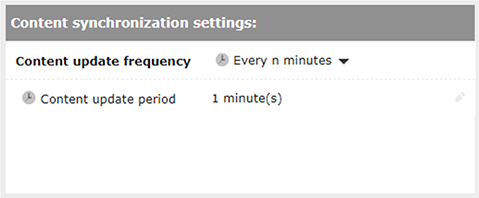
Please set Content update frequency to decide how often you want to check content updates.
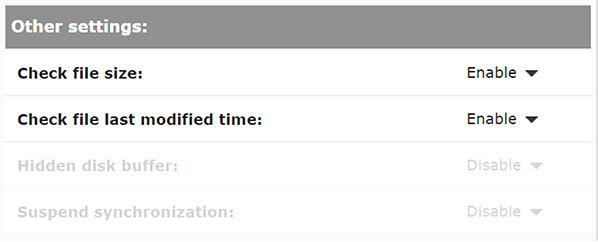
STEP 3 :
Then, you must decide what kinds of new files you want to download. SMP will only download new contents during the synchronization. You can choose to compare the file size or the file modified time of the server and player. You are obliged to choose at least one method to continue. We suggest you enable both.
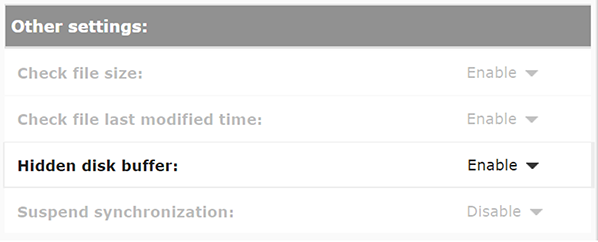
STEP 4 :
If you would like to download files to the hidden disk space, please enable Hidden disk buffer. After the downloading process completes, the system will copy all files to Media Folder immediately. The advantage of this function is to make sure that SMP will not play contents until all files are completely downloaded. We suggest you enable this option.
STEP 5 :
You may want to synchronize contents only when your network traffic is low. Then, you can enable Suspend synchronization, and specify the day (s) and time when you want to stop updating content between the server and the player, so that you can control the usage of network bandwidth.
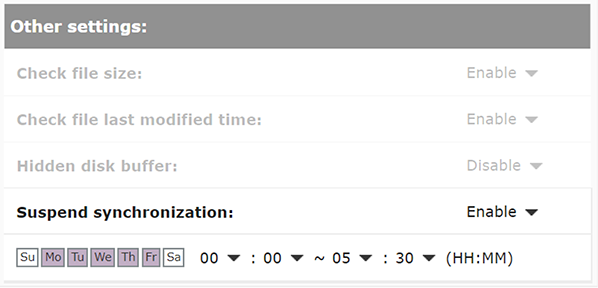
NOTE : If the SMP player is downloading files while the specified time occurs, the procedure will not stop until the downloading file is completely downloaded. For the rest ofthe files, the SMP player will keep downloading them during the next period of content synchronization.
STEP 6 :
Click Save to save and apply the settings.