Why 3G/4G network?
CAYIN’s digital signage system can integrate with GSM and LTE network and allows you to manage media players virtually anywhere over mobile phone network. In this document, we will walk you through the process to enable the 3G/4G network.
Before getting started
You need to prepare the following items before enablingthe 3G/4G network function.
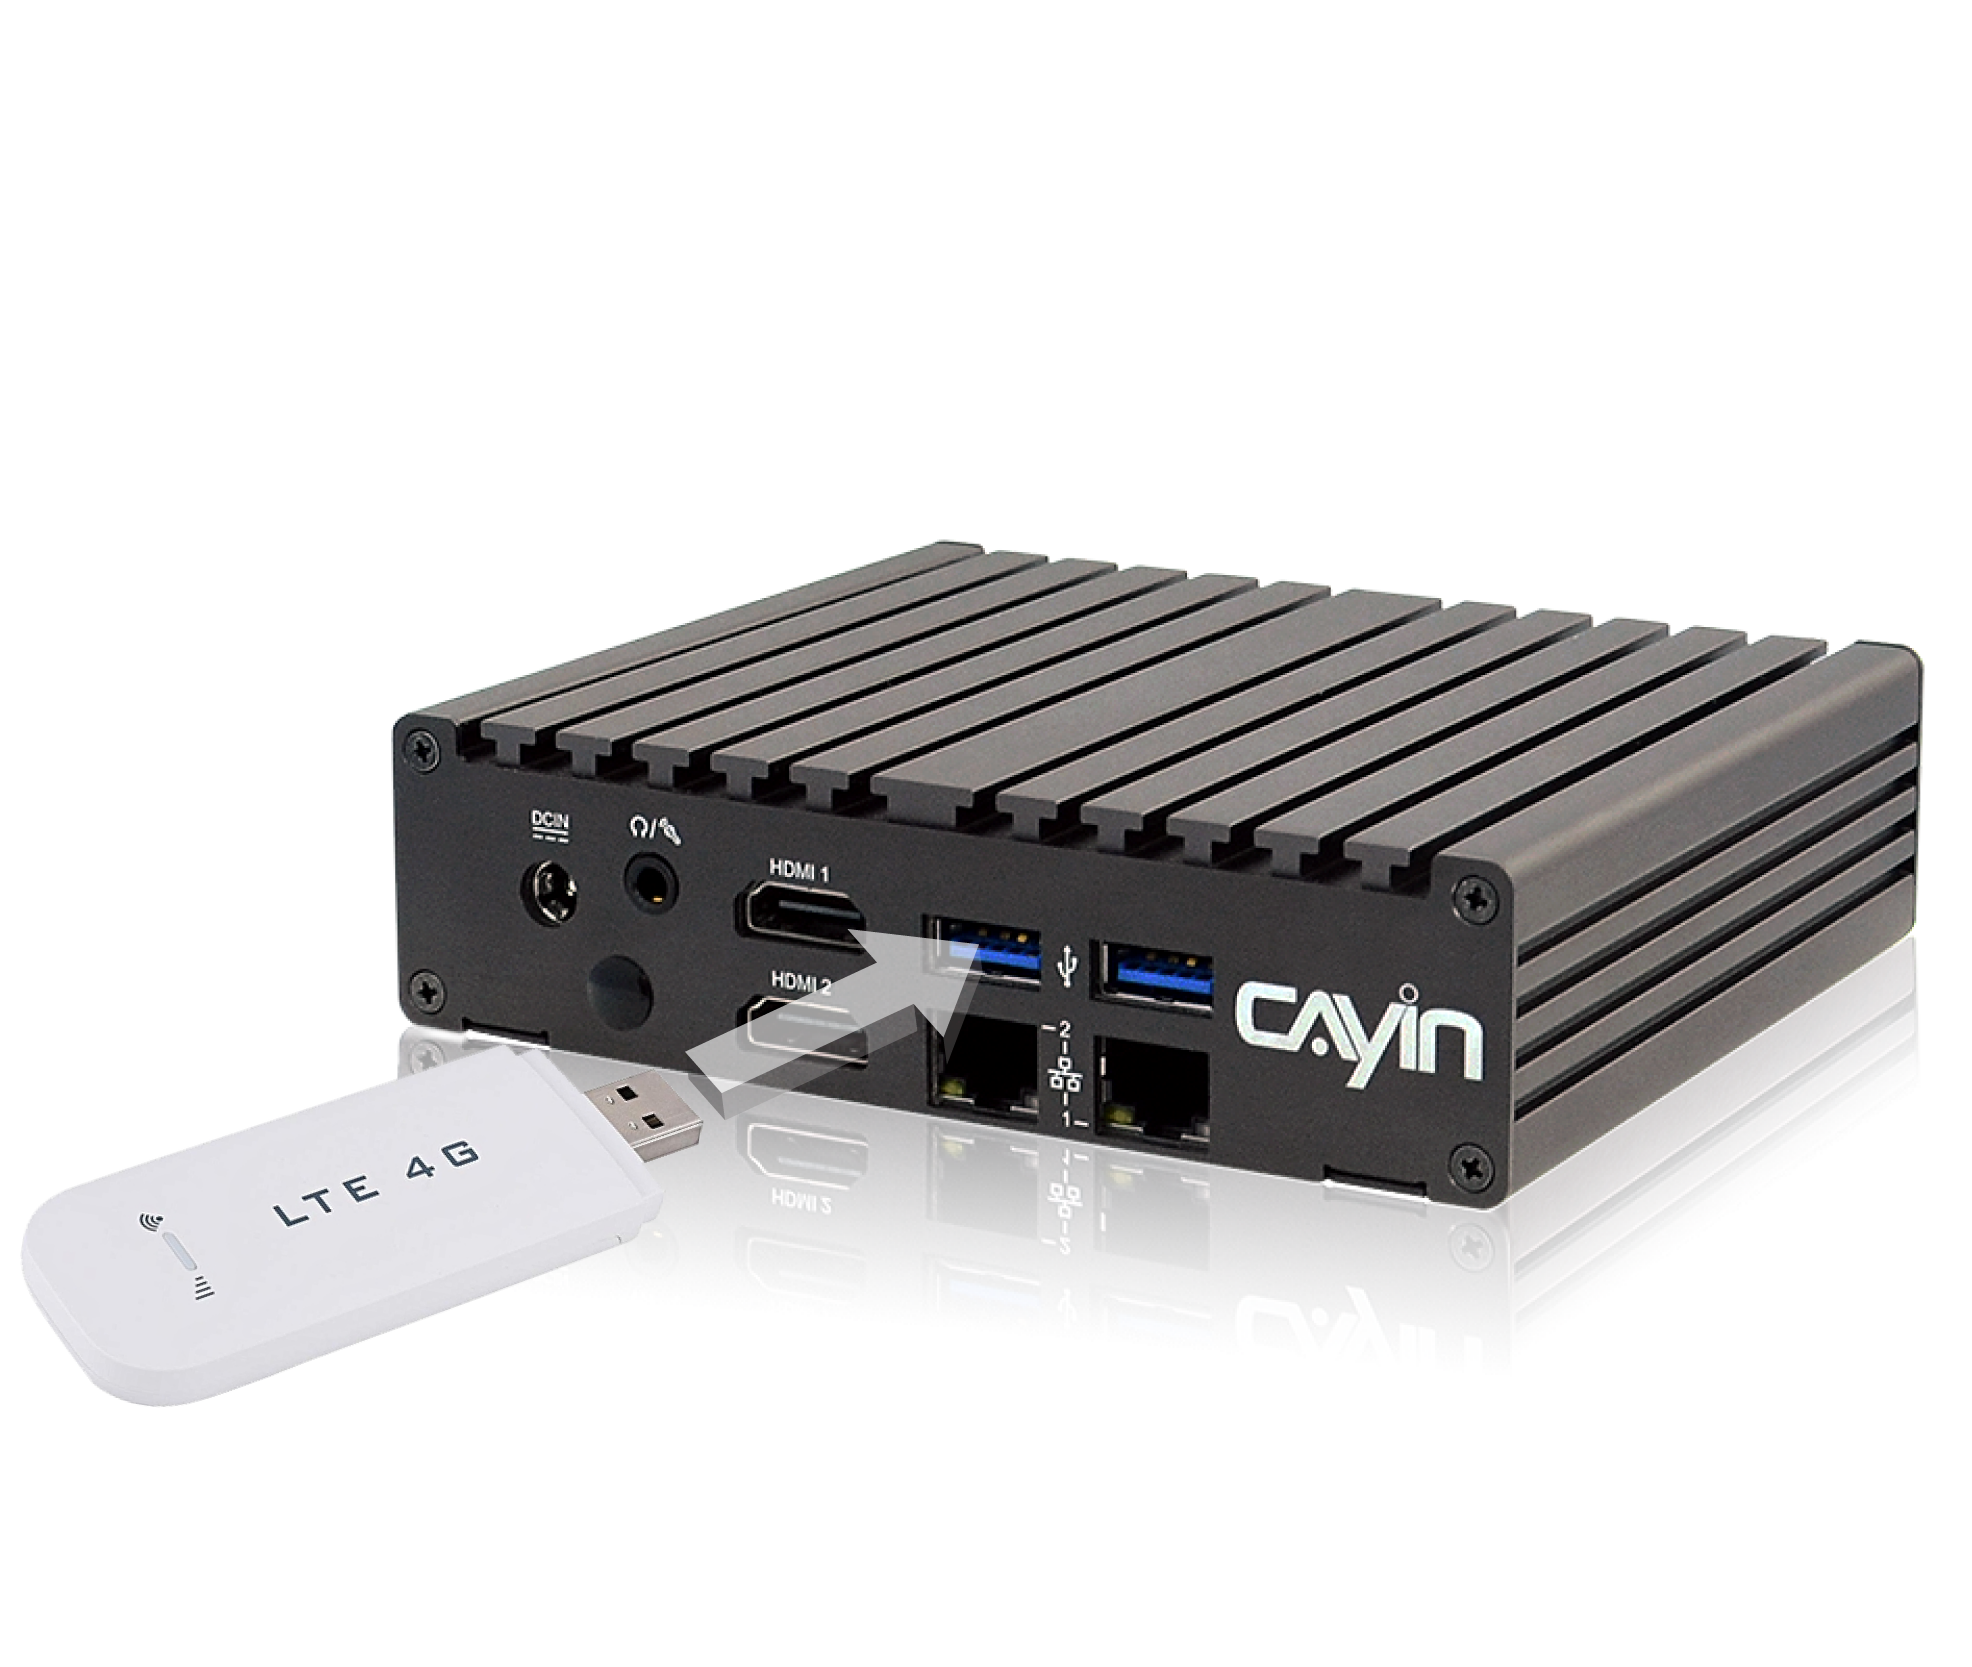
- An SMP-NEO series player that connects to a 3G/4G USB modem.
- A 3G/4G USB modem that will connect to the SMP player. A SIM card which supporting 3G/4G data network is also required.
- A CMS (v.9.0 or above) server that manages the SMP player remotely.
Configuration procedures
Please follow the steps below to configure settings of the SMP player.
STEP 1 : Plug in 3G/4G USB modem into the USB port on the front panel.
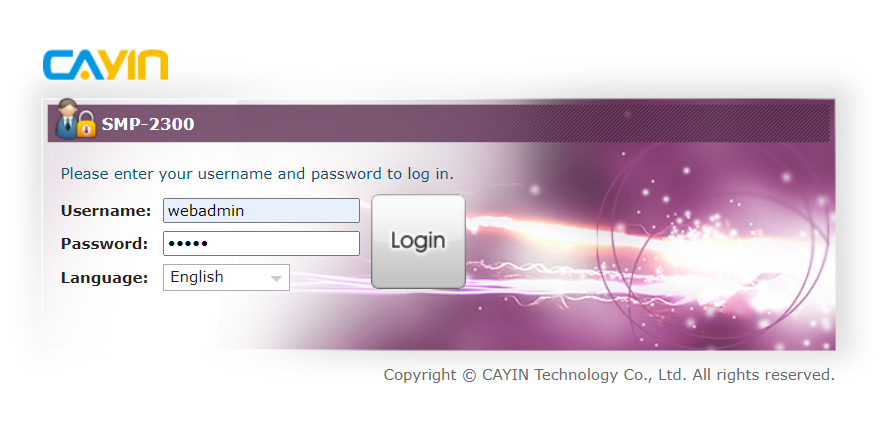
STEP 2 : Go to SMP’s Web Manager page
STEP 3 : Start to configure network settings
- Go to 3G/4G Data Network Adapter
page (System > Peripheral >
3G/4G ). In this page, you can see the model of 3G/4G USB modem
you are using now. If you don't attach any 3G/4G USB modem to this SMP player,
you will see N/A here.
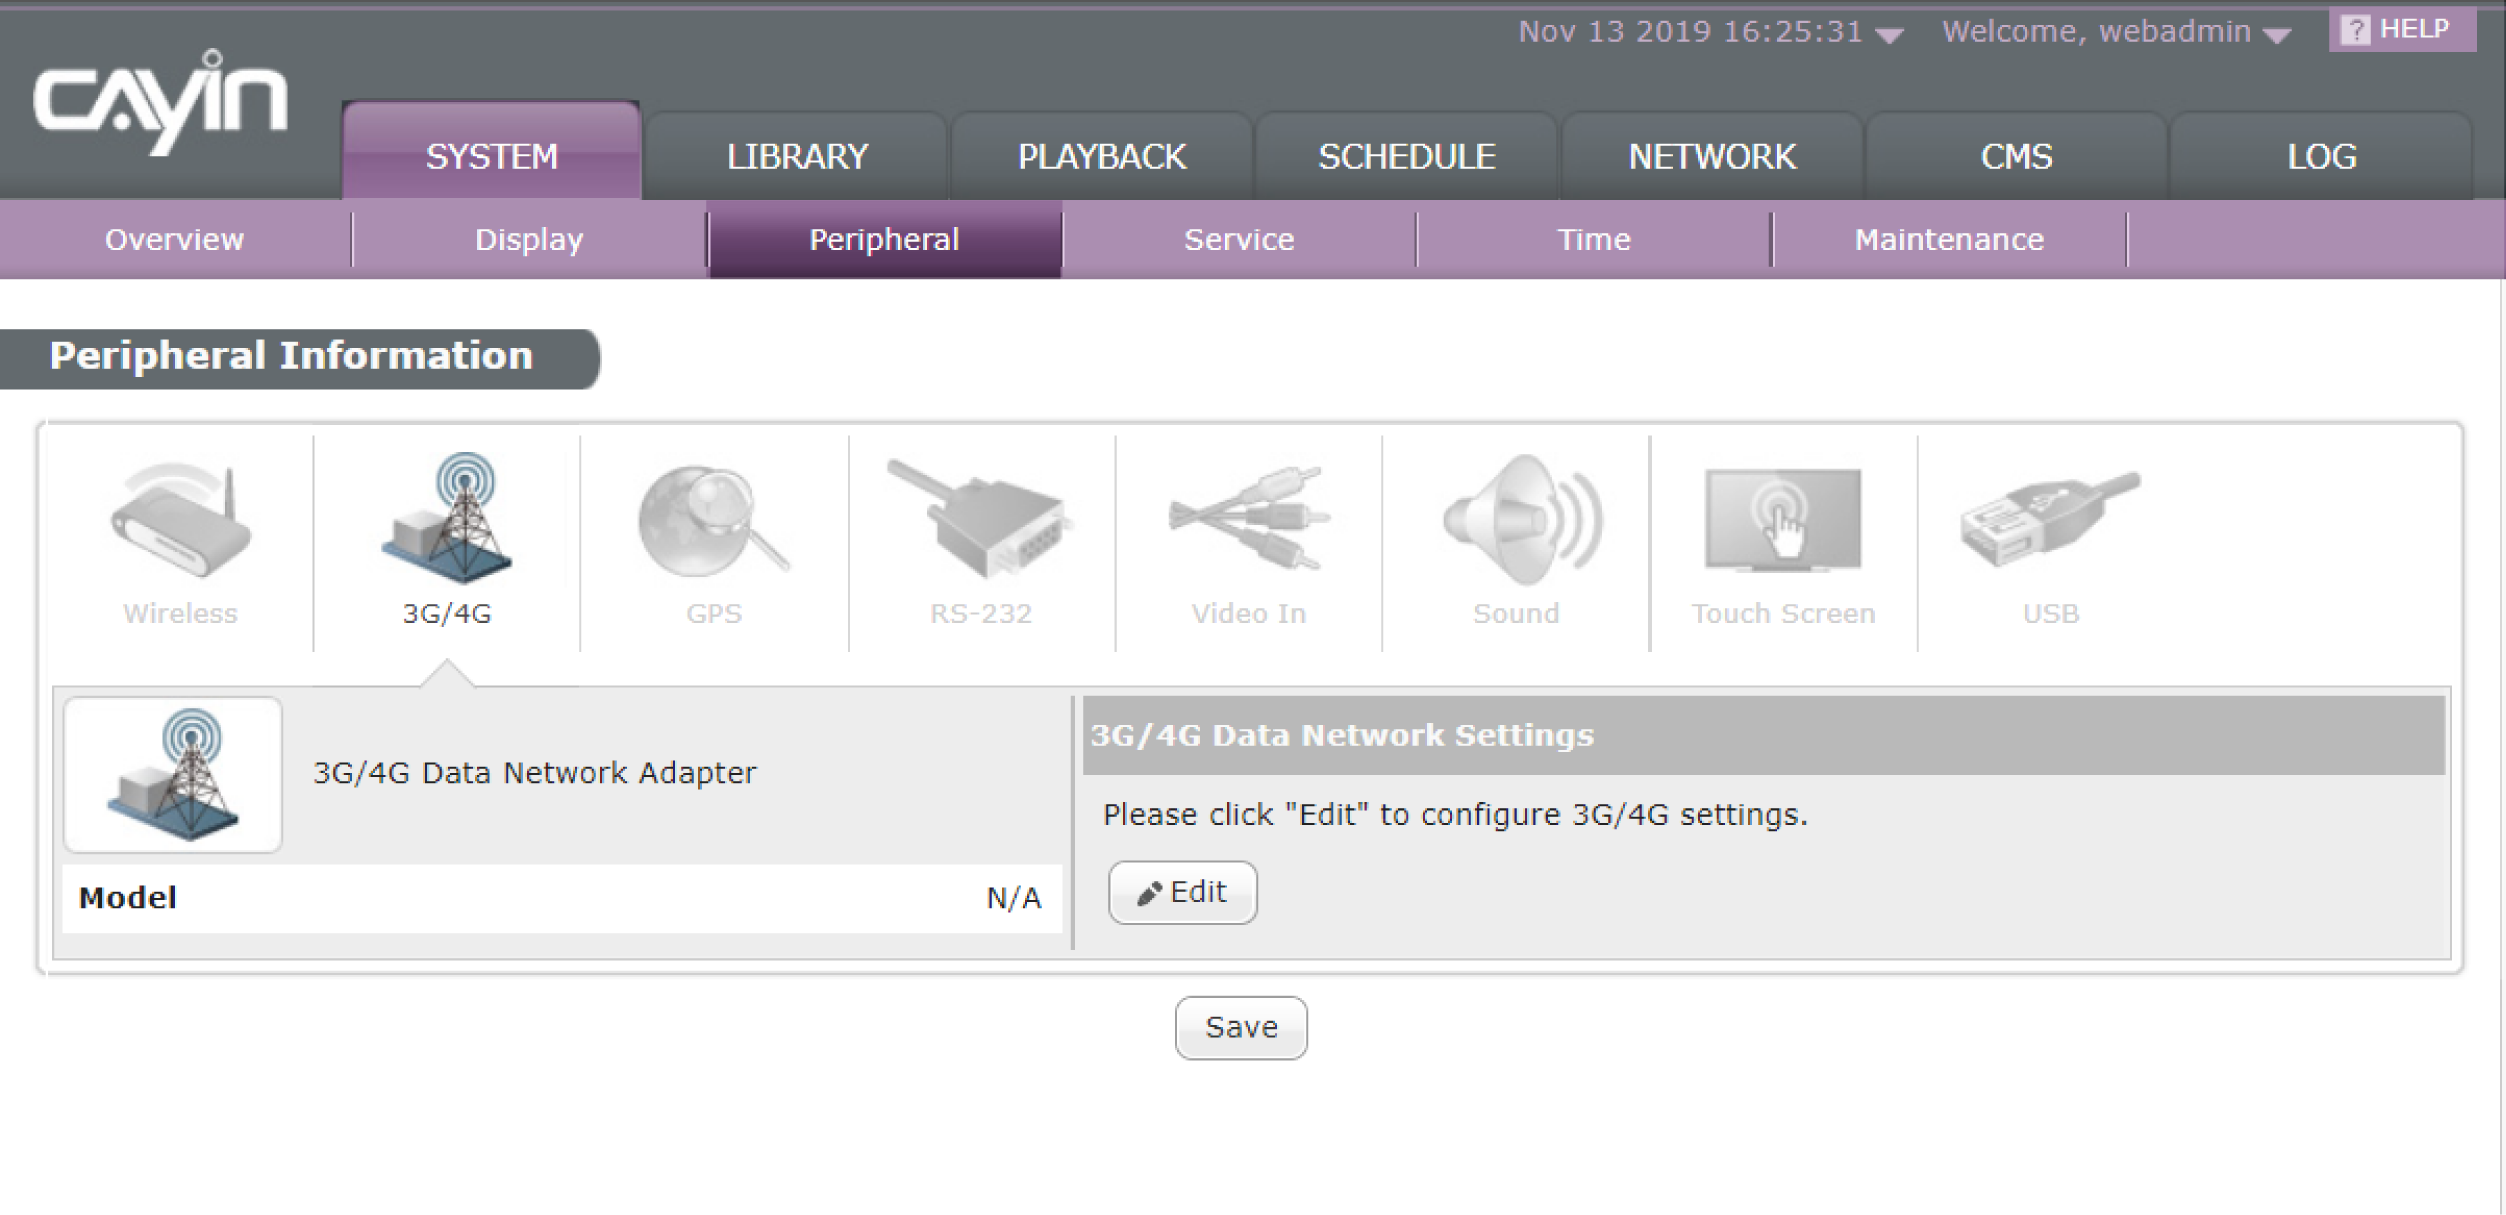
- Click the icon Edit to fill in all necessary fields required by
your 3G/4G ISP
(Internet Service Provider). You may not need to fill in all those fields
provided here. Different ISP requires and provides different access settings, so
please check with your ISP.
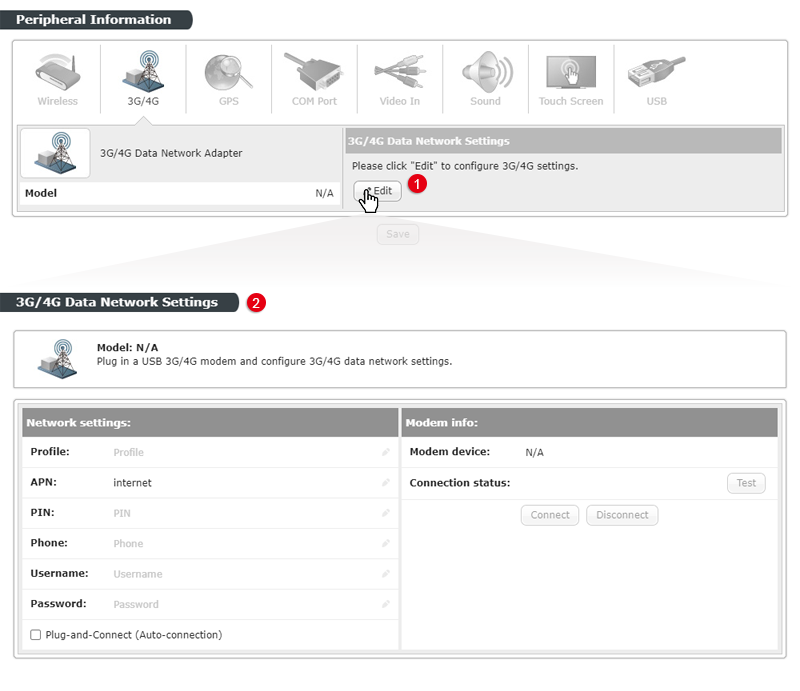
NOTE : If your SIM card is secured by a PIN code, you need to enter the correct PIN code before you use it. If you fail to enter the correct code, you will see the following two messages:
- Incorrect PIN code : You enter a wrong PIN code or haven't entered any PIN code.
- PUK is required : If you enter wrong PIN codes three times, the SIM card will be locked. Then you need to enter PUK to unlock it. Therefore, please take extra care when you enter the PIN number. You get three tries to enter the PIN, and your SIM card will be locked if you fail after these tries. If the above situation happens, you need to consult your ISP and unlock the phone before you can re-configure 3G/4G connection again.
- We suggest you enable this function: Plug-and-Connect (Auto-connection). If you enable this function, the SMP player will connect to the 3G/4G network automatically whenever the player is turned on or the 3G/4G USB modem is plugged in.
- Click Save. Then click Connect to establish the connection.
- Once your 3G/4G USB modem is connected to the player, the system will
automatically capture all related modem information.
Modem DeviceIt shows the 3G/4G USB modem you are using now.Connection StatusIf the player connects to the 3G/4G network, it will show Connected. When you just plug in the 3G modem, it should show Disconnected. You can click
 to check the
connection. If it shows
No 3G/4G modem present, it means the USB modem doesn't physically
connect to the player.
to check the
connection. If it shows
No 3G/4G modem present, it means the USB modem doesn't physically
connect to the player.
 You can click these two buttons to connect or disconnect the 3G/4G network manually.
STEP 4 : Access 3G/4G network successfully
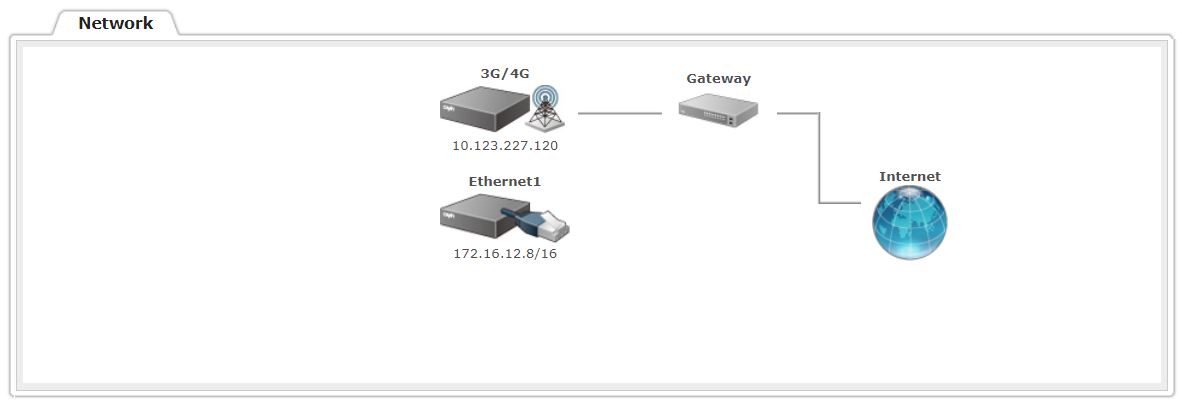
When this SMP player connects 3G/4G network, you can see the connection status on the System Overview page (SYSTEM > Overview).
Locate and manage each SMP player
When you use 3G/4G network, the SMP player might change IP address periodically (based on the setting of your 3G/4G USB modem). So, the only way to access each SMP player remotely is to locate it by CMS.
STEP 1 :
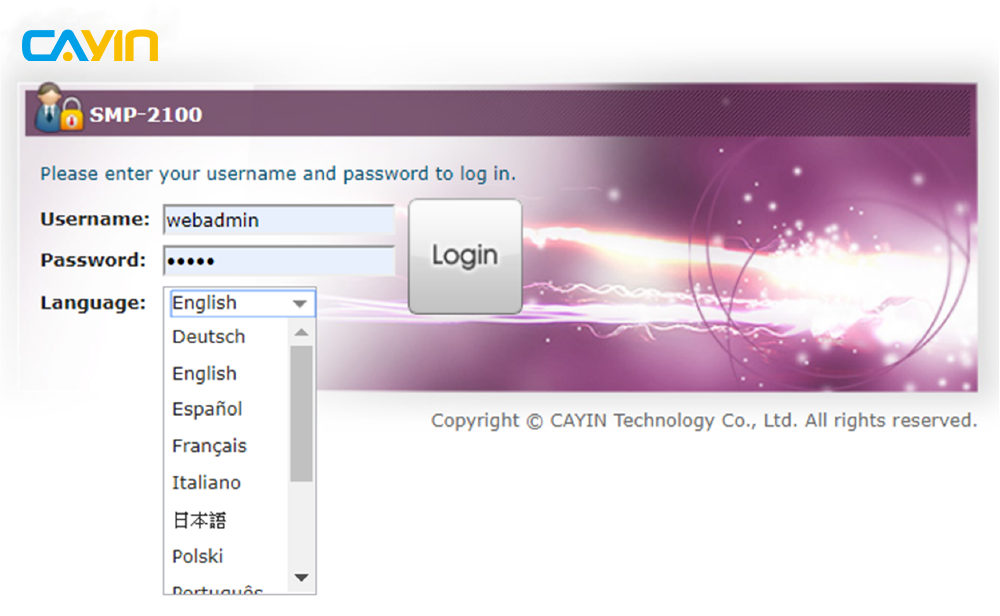
Log in SMP Web Manager. Enter your username and password and select the language display for your user interface. Then, click Login.
STEP 2 :
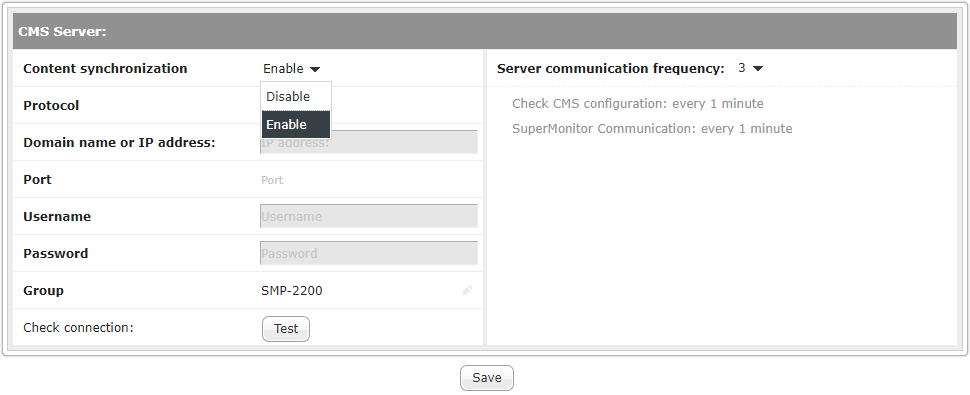
Go to CMS > CMS Connection. Select Enable to enable content synchronization.
STEP 3 :
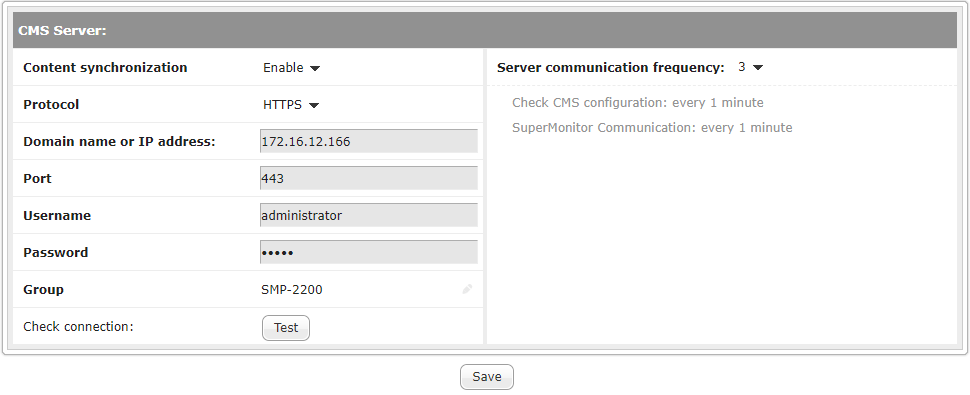
Please enter the FQDN hostname or IP address of the CMS server to which this SMP player will connect. Then, enter the exact Username, Password and Group name, and CMS port number of the account. Be aware that the system is case sensitive.
NOTE : To add more SMP players into any given group, you just need to give the same group name to those players. We strongly suggest that players should have different hostnames, or it would be hard for you to tell one from another.
STEP 4 :
After completing all settings, please click Test to check the validity of the Username, Password, Group, and IP address.
STEP 5 :
Adjust the frequency parameters for several SMP/CMS services. The frequency value is from 5 (Frequent) to 1 (Infrequent). If you don't need to check configuration updates from CMS to SMP frequently, you can lower the frequency and reduce network traffic.
(period per area)
(period every heartbeat)
STEP 6 :
Click Save to save and apply the settings. For more details, please refer to Establish Communication between a CMS Server and a SMP Player.
STEP 1 :
Log in to CMS Web Manager and click PLAYER. Then, you
can see a
table listing all players connected to this CMS server. Click on a group to
check all players in the group or select All Players to view all
connected
players.
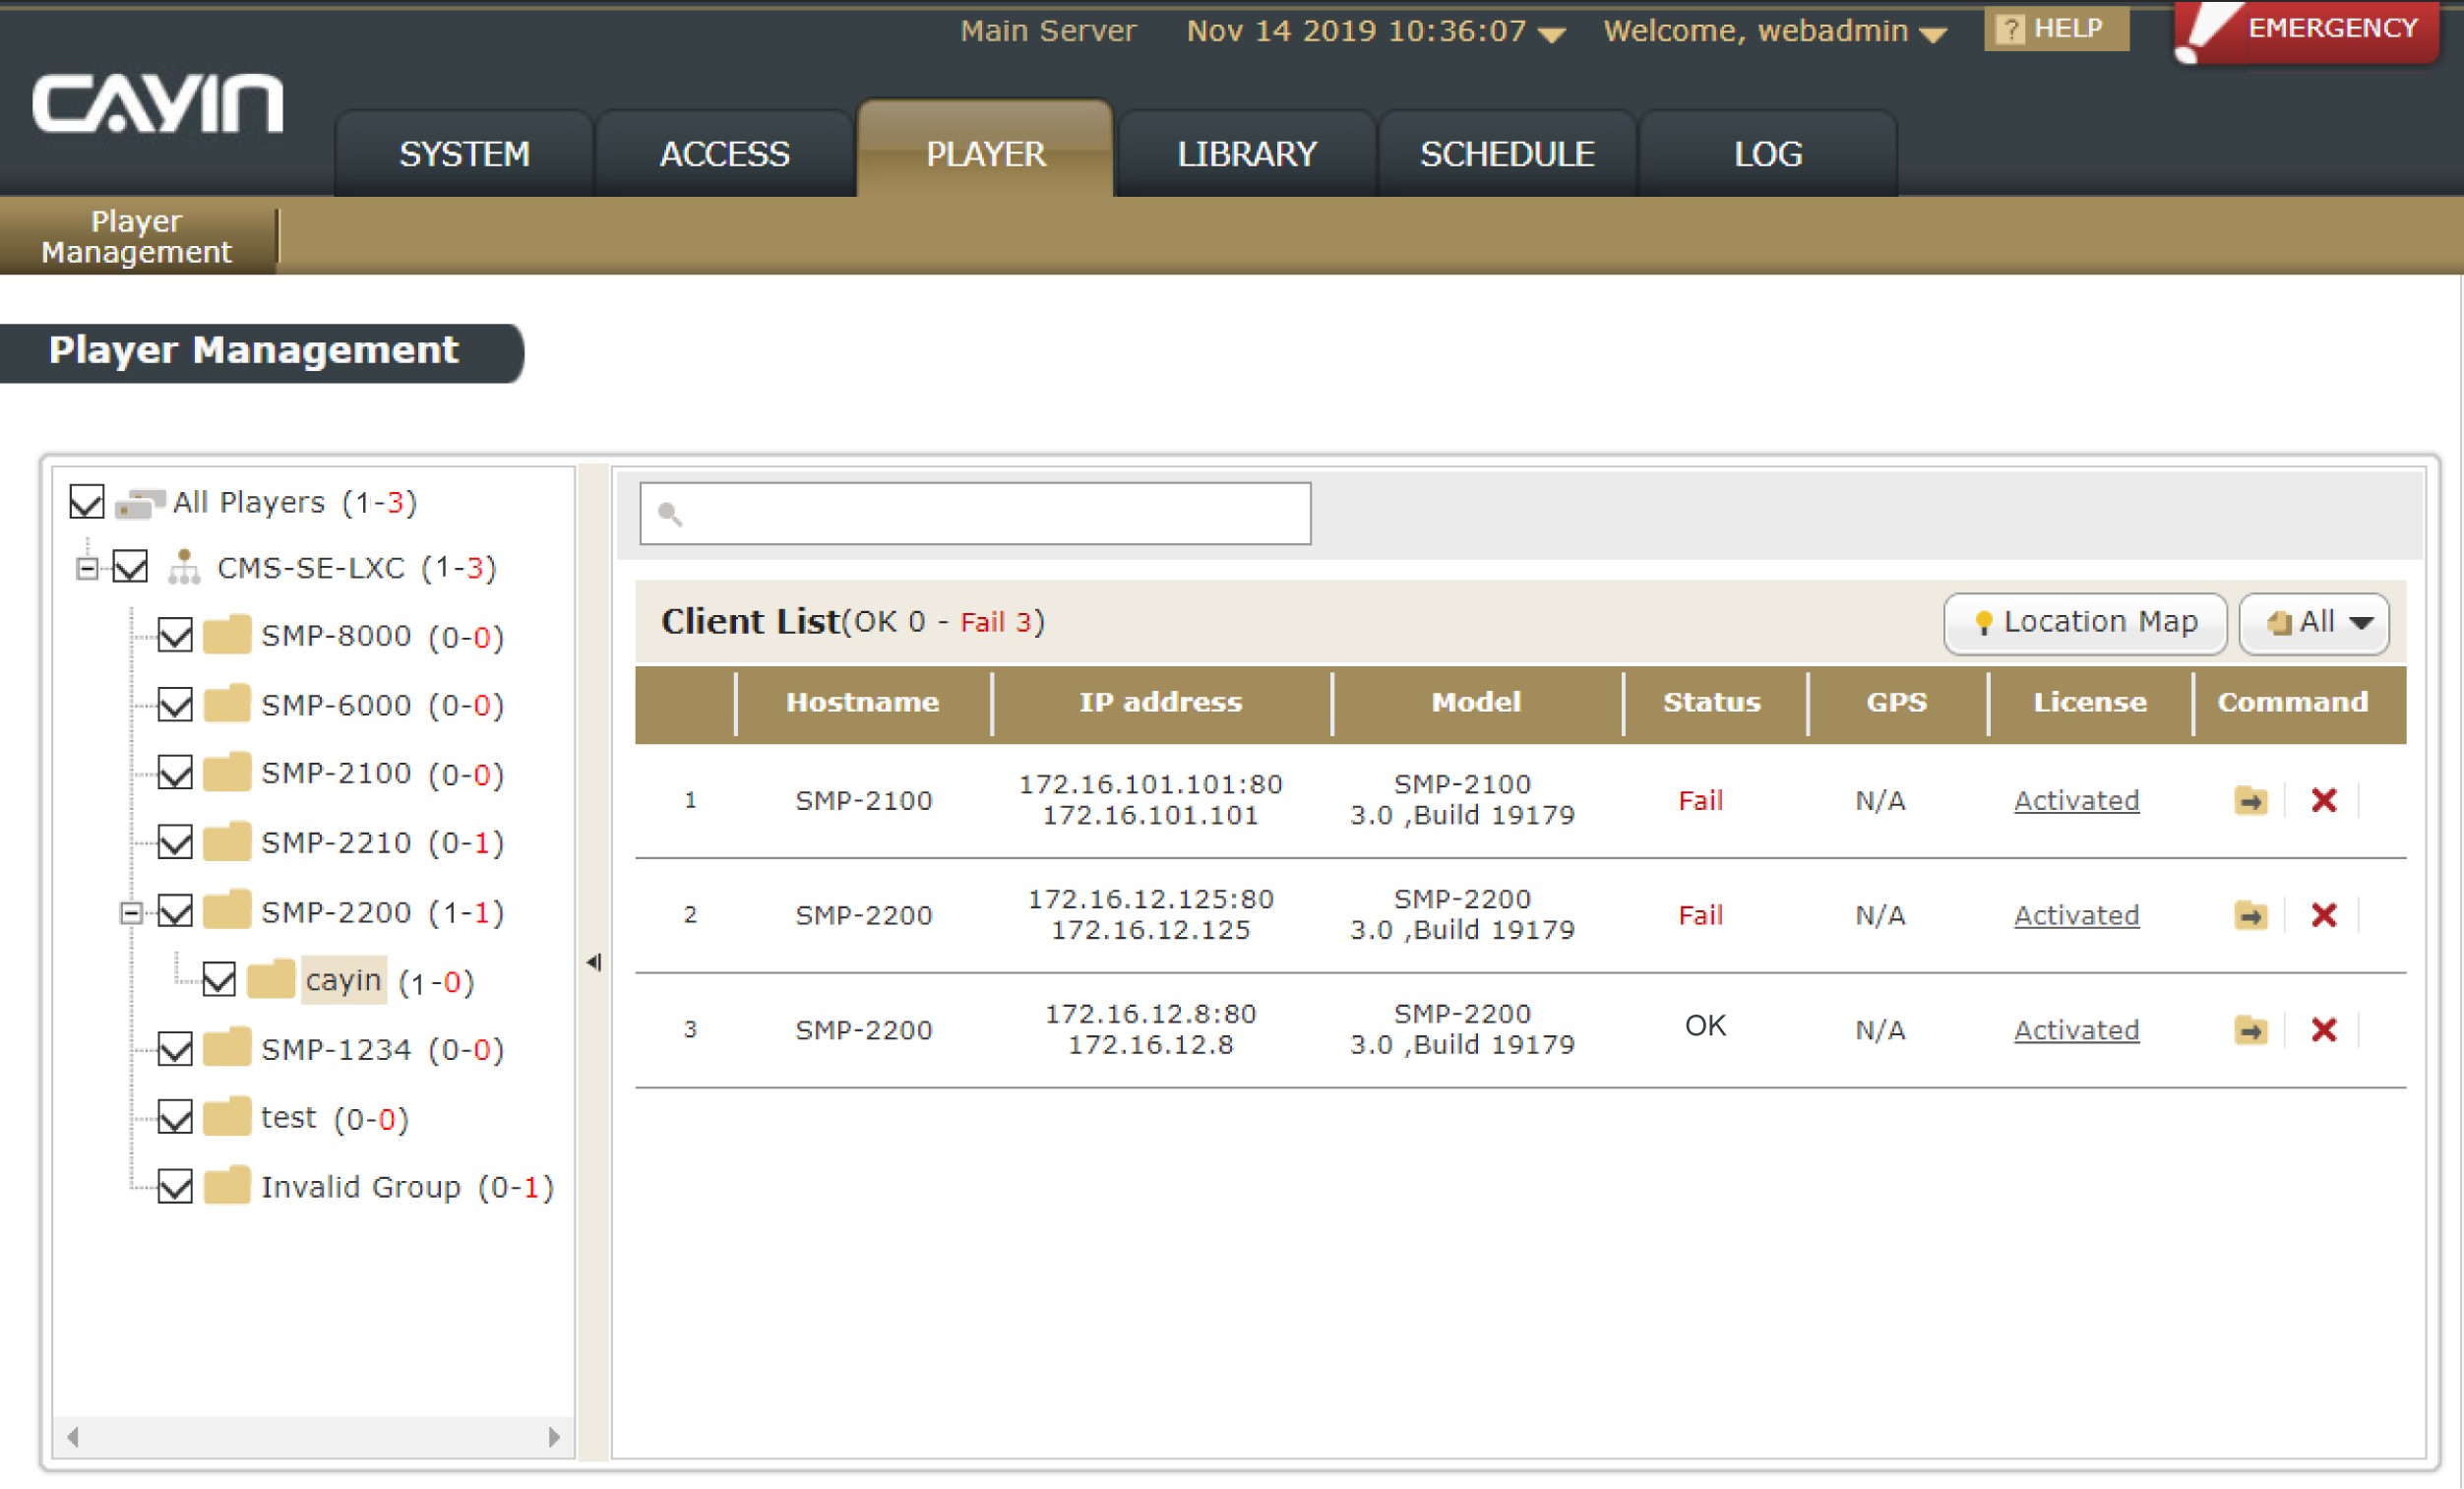
STEP 2 :
You can check the connection status and other detailed information of each SMP player in this table.
STEP 3 :
If you need to access the Web Manager of a specific SMP player, please
click
 . Then, you can start to log in
and change the settings of
that player.
. Then, you can start to log in
and change the settings of
that player.
If the SMP’s IP changes when you’re managing the player via Web Manager, the connection will be terminated. Then, you need to go back to CMS Web Manager, repeat steps above, locate that SMP player again and re-establish the connection.