Why location-based digital signage?
In addition to fixed locations, CAYIN’s digital signage system advances to integrate with GSM, 4G LTE, GPS (Global Positioning System) technologies, and Google Maps to provide excellent mobile and digital place-based signage solutions, enabling advertisers to communicate with target audiences at the specific time and place. In this document, we will introduce how you can utilize GPS technology to play location-based content.
If you need to use 3G/4G as a network connection, see Manage Digital Signage Over 3G/4G Network.
Before getting started
You need to prepare the following items before you can use GPS functions.
- An SMP-NEO series player that connects to a display.
- A USB/COM GPS receiver (NMEA 0813 compatible) that will connect to the player.
- A CMS (v.9.0 or above) server that manages the SMP player remotely.
Activate GPS receiver
Please follow the steps below to complete the settings of GPS connection.
STEP 1 : Connect a GPS receiver to the SMP player.
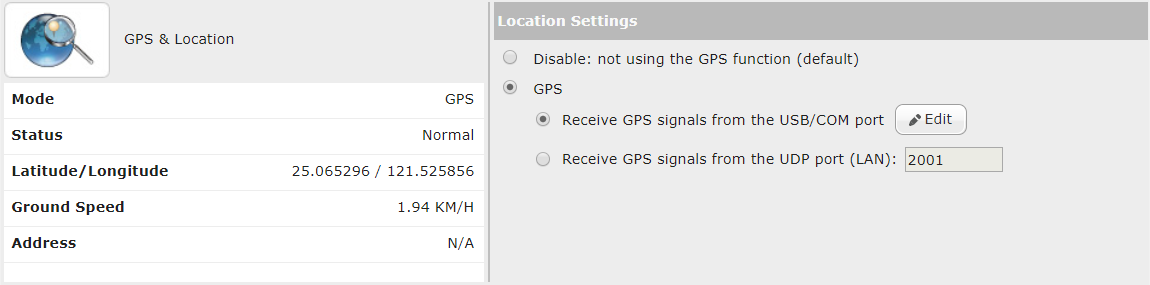
STEP 2 : Go to SMP’s Web Managerpage. Log in to SMP Web Manager and go to GPS & Location page (SYSTEM > Peripheral > GPS ). In the left column, you can check information about GPS and location, such as the GPS mode, status, latitude/longitude, ground speed, and address.
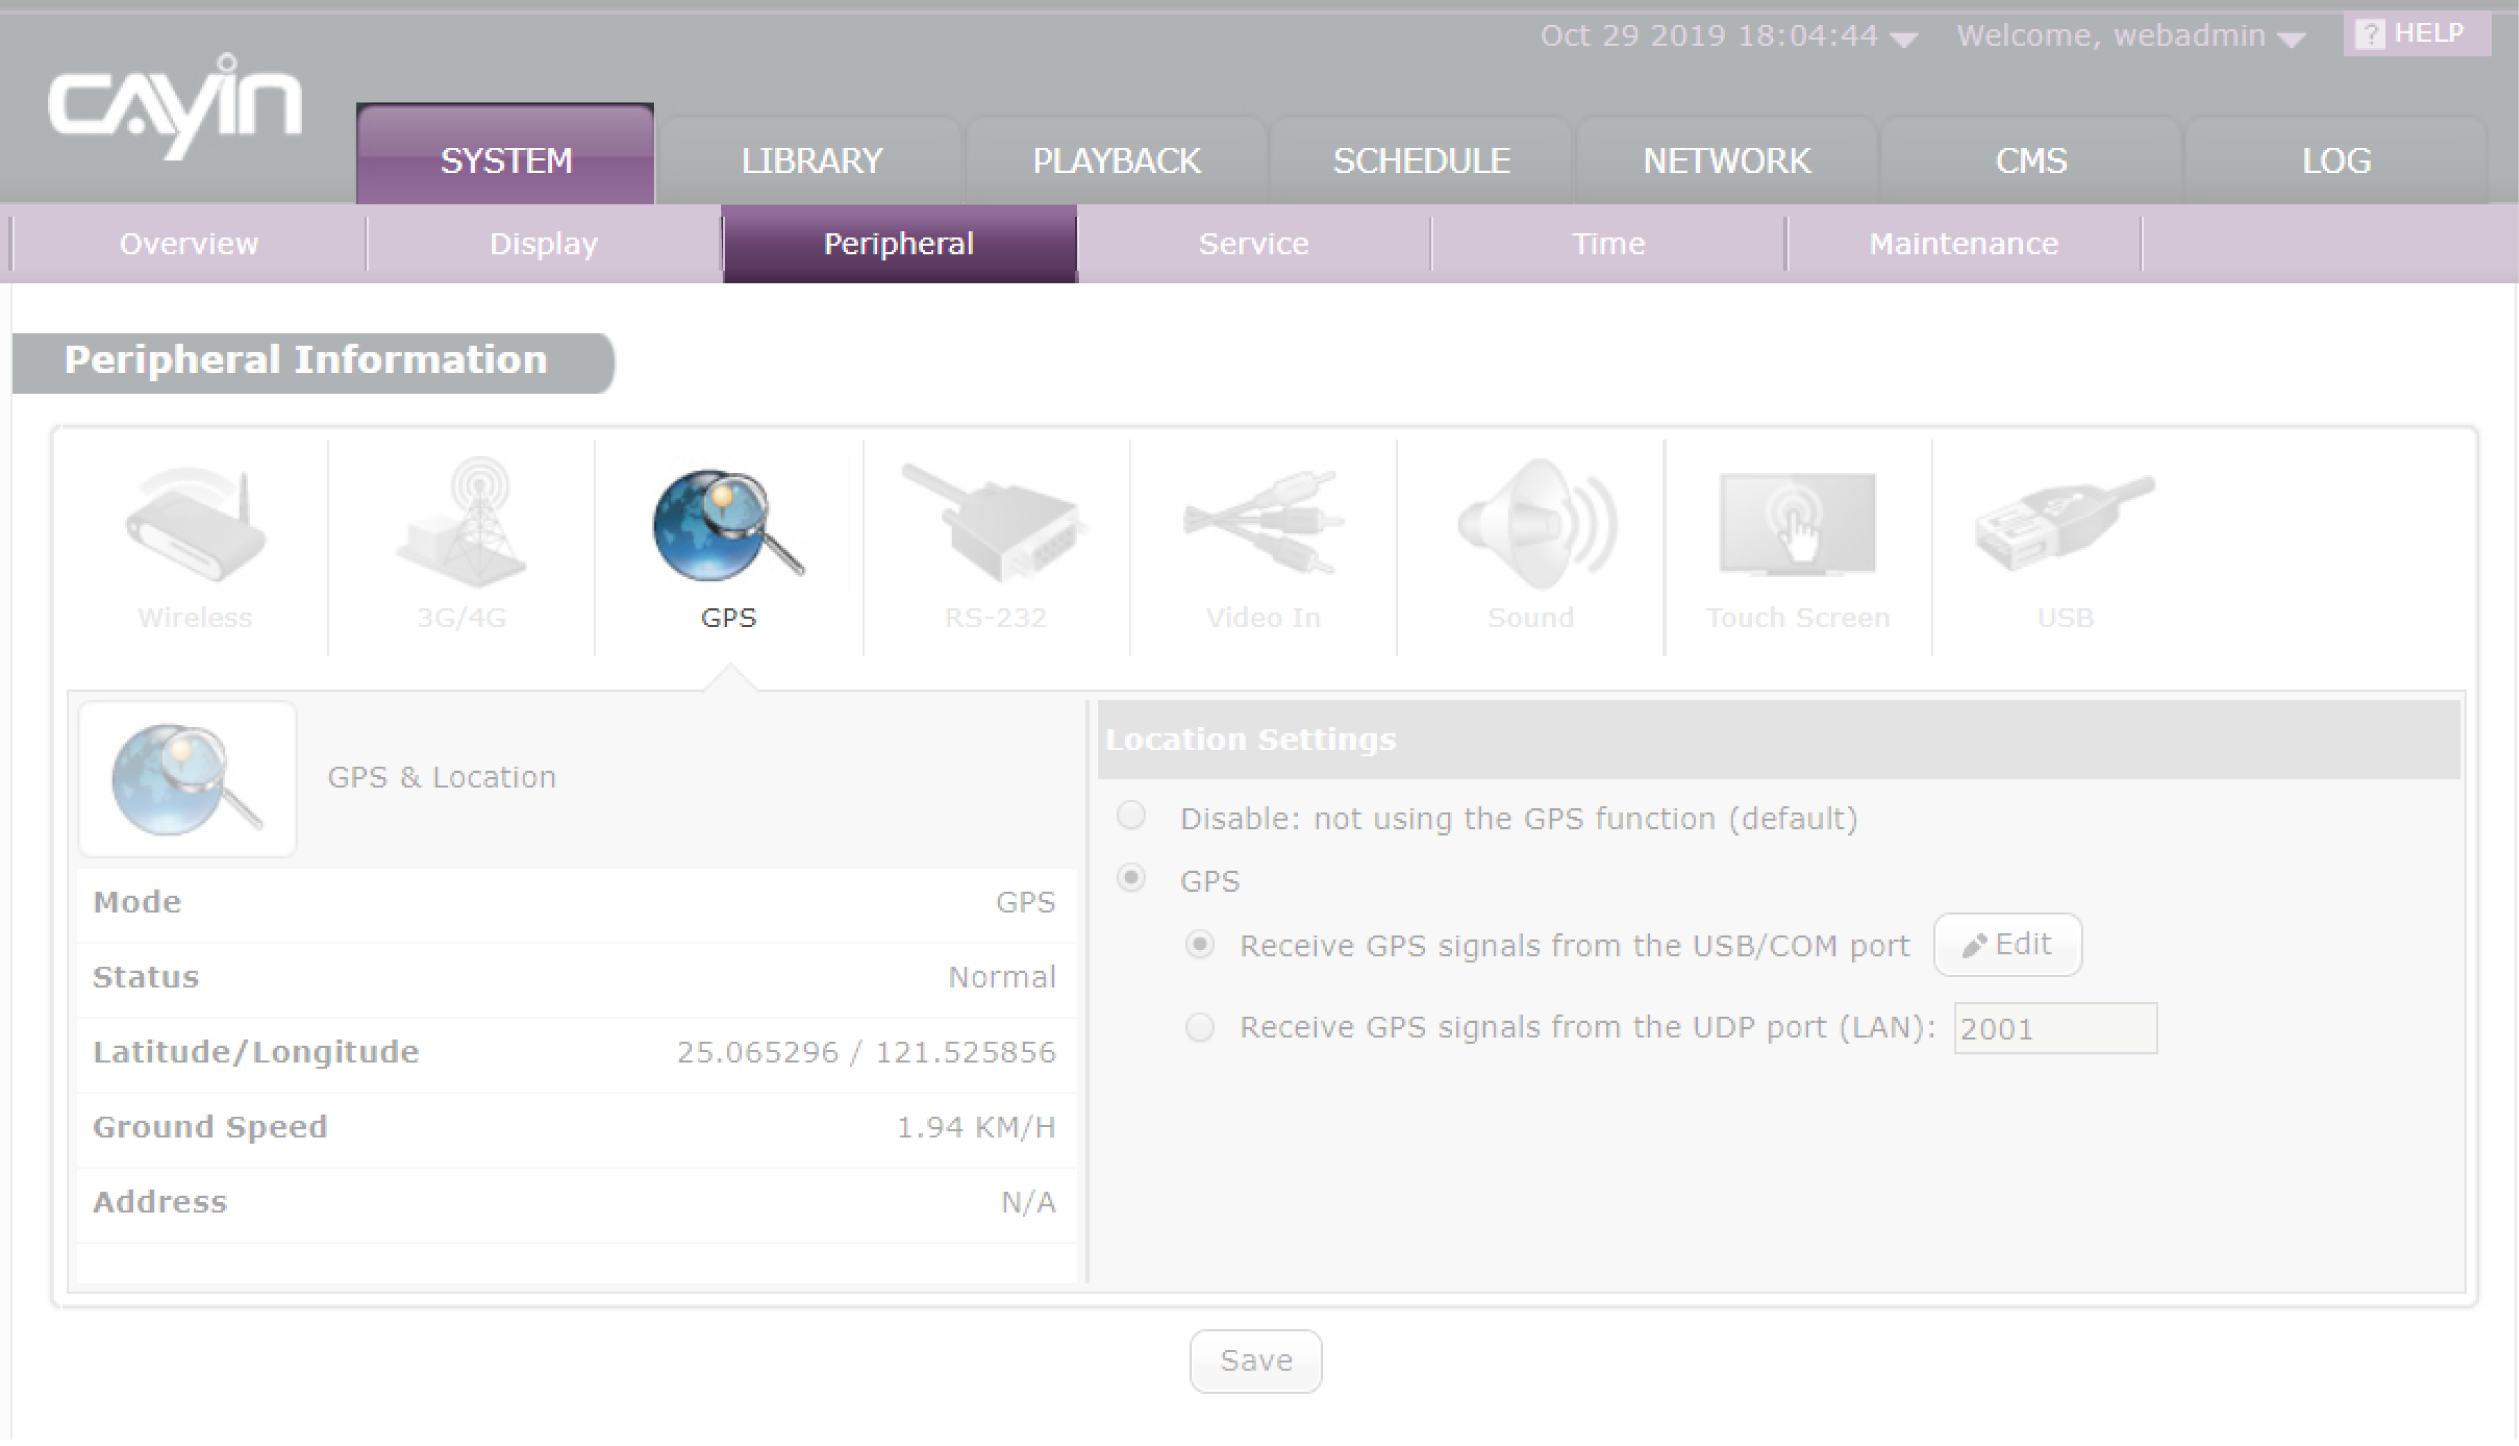
STEP 3 : Activate GPS
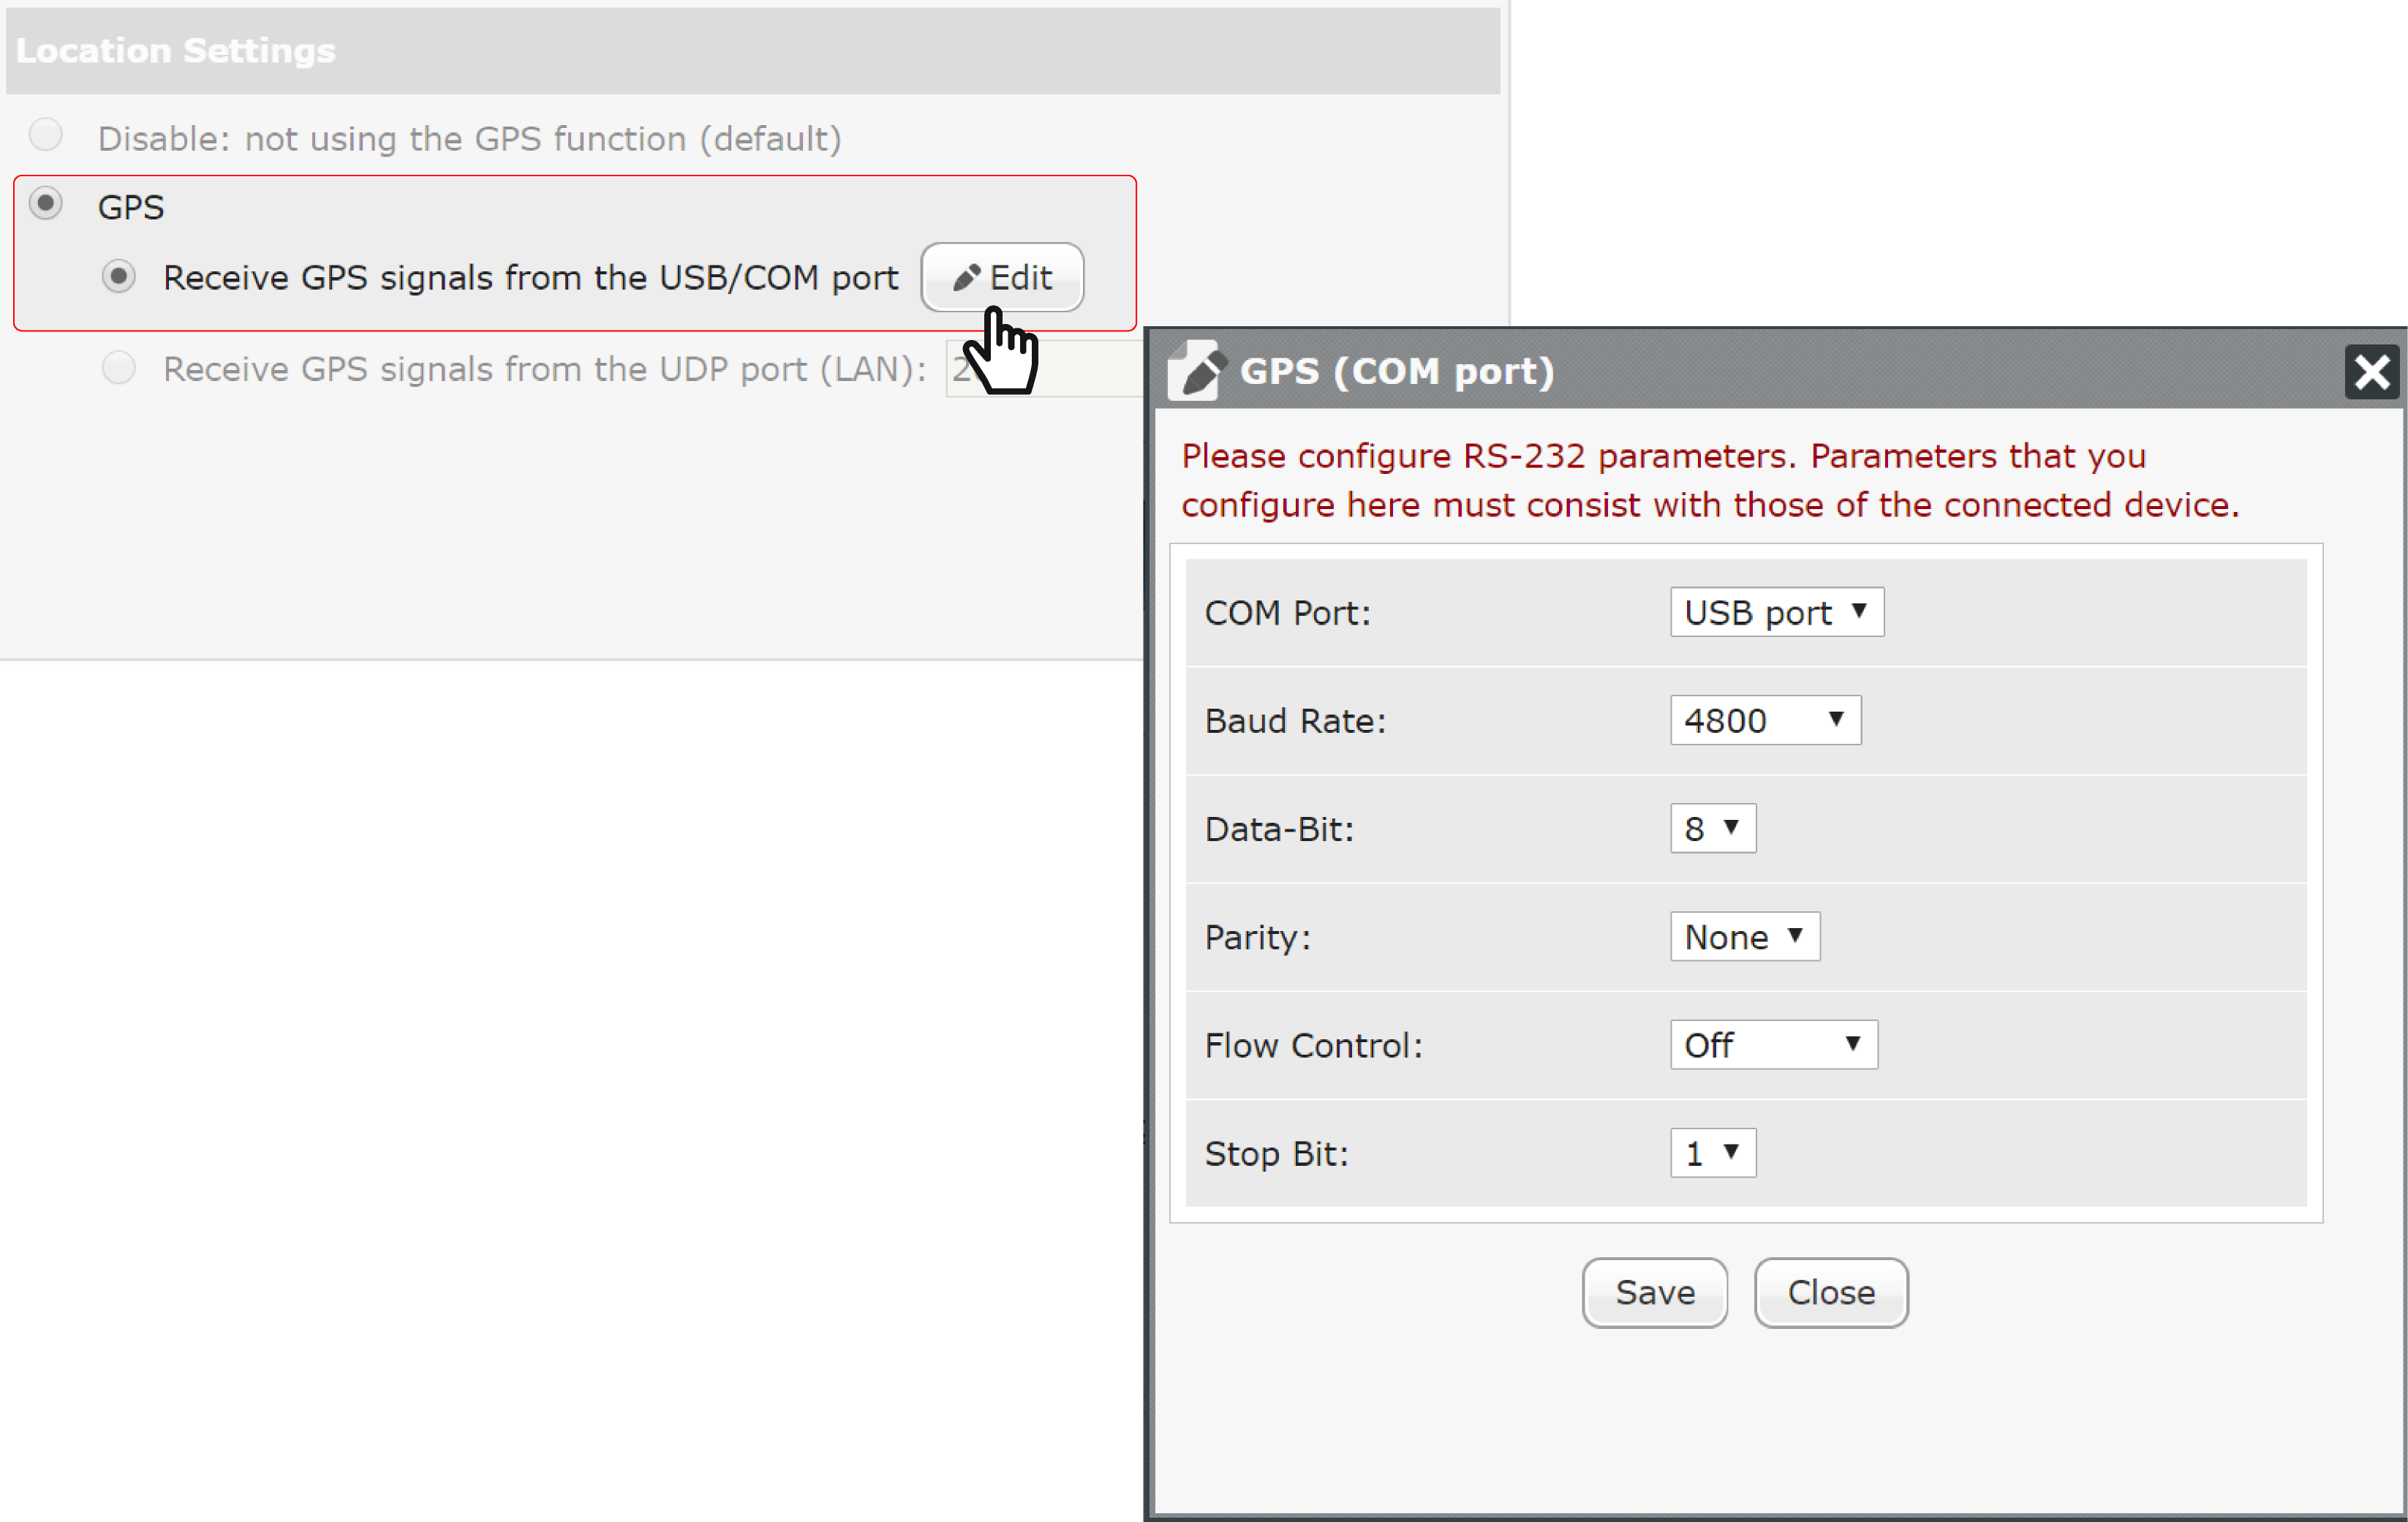
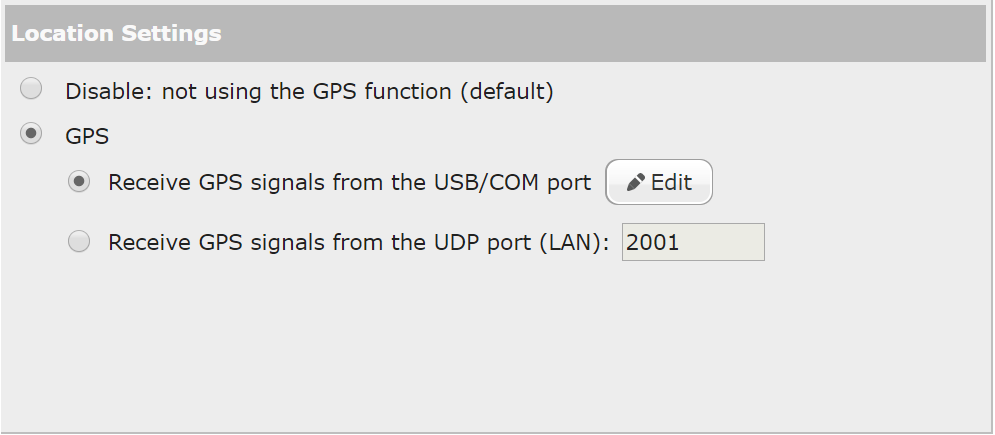
In the right column, you can edit location settings. Enable the GPS function. There are two types of GPS sources. Please select the one you are using now and configure it accordingly.
- Receive GPS signals from the USB/COM Port: Click
Edit and fill
in all necessary fields based on the manual of that GPS receiver, such as Baud
rate, Data-bit, parity, Flow control, and Stop bit.
- Receive GPS signals from the UDP port (LAN): Fill in the port
number here.
STEP 4 : Connect GPS successfully
If you enable the GPS function and finish configurations successfully, you can see the GPS connection status in the left column.
In addition, you can also check the current location of the SMP player in the System Overview page (SYSTEM > Overview). Click the map and you will be able to see the SMP player moving on the map if the SMP player is installed in a mobile vehicle. The map will be refreshed every 5 seconds.

Create a location-based campaign
SMP players can play content based on locations. Now, we use an example to show you how you could play a full-screen video within a specific geographic area. Please follow the steps below to configure related settings.
STEP 1 : Go to SMP’s Web Manager page
Log in to SMP Web Manager and click SCHEDULE on the main menu.
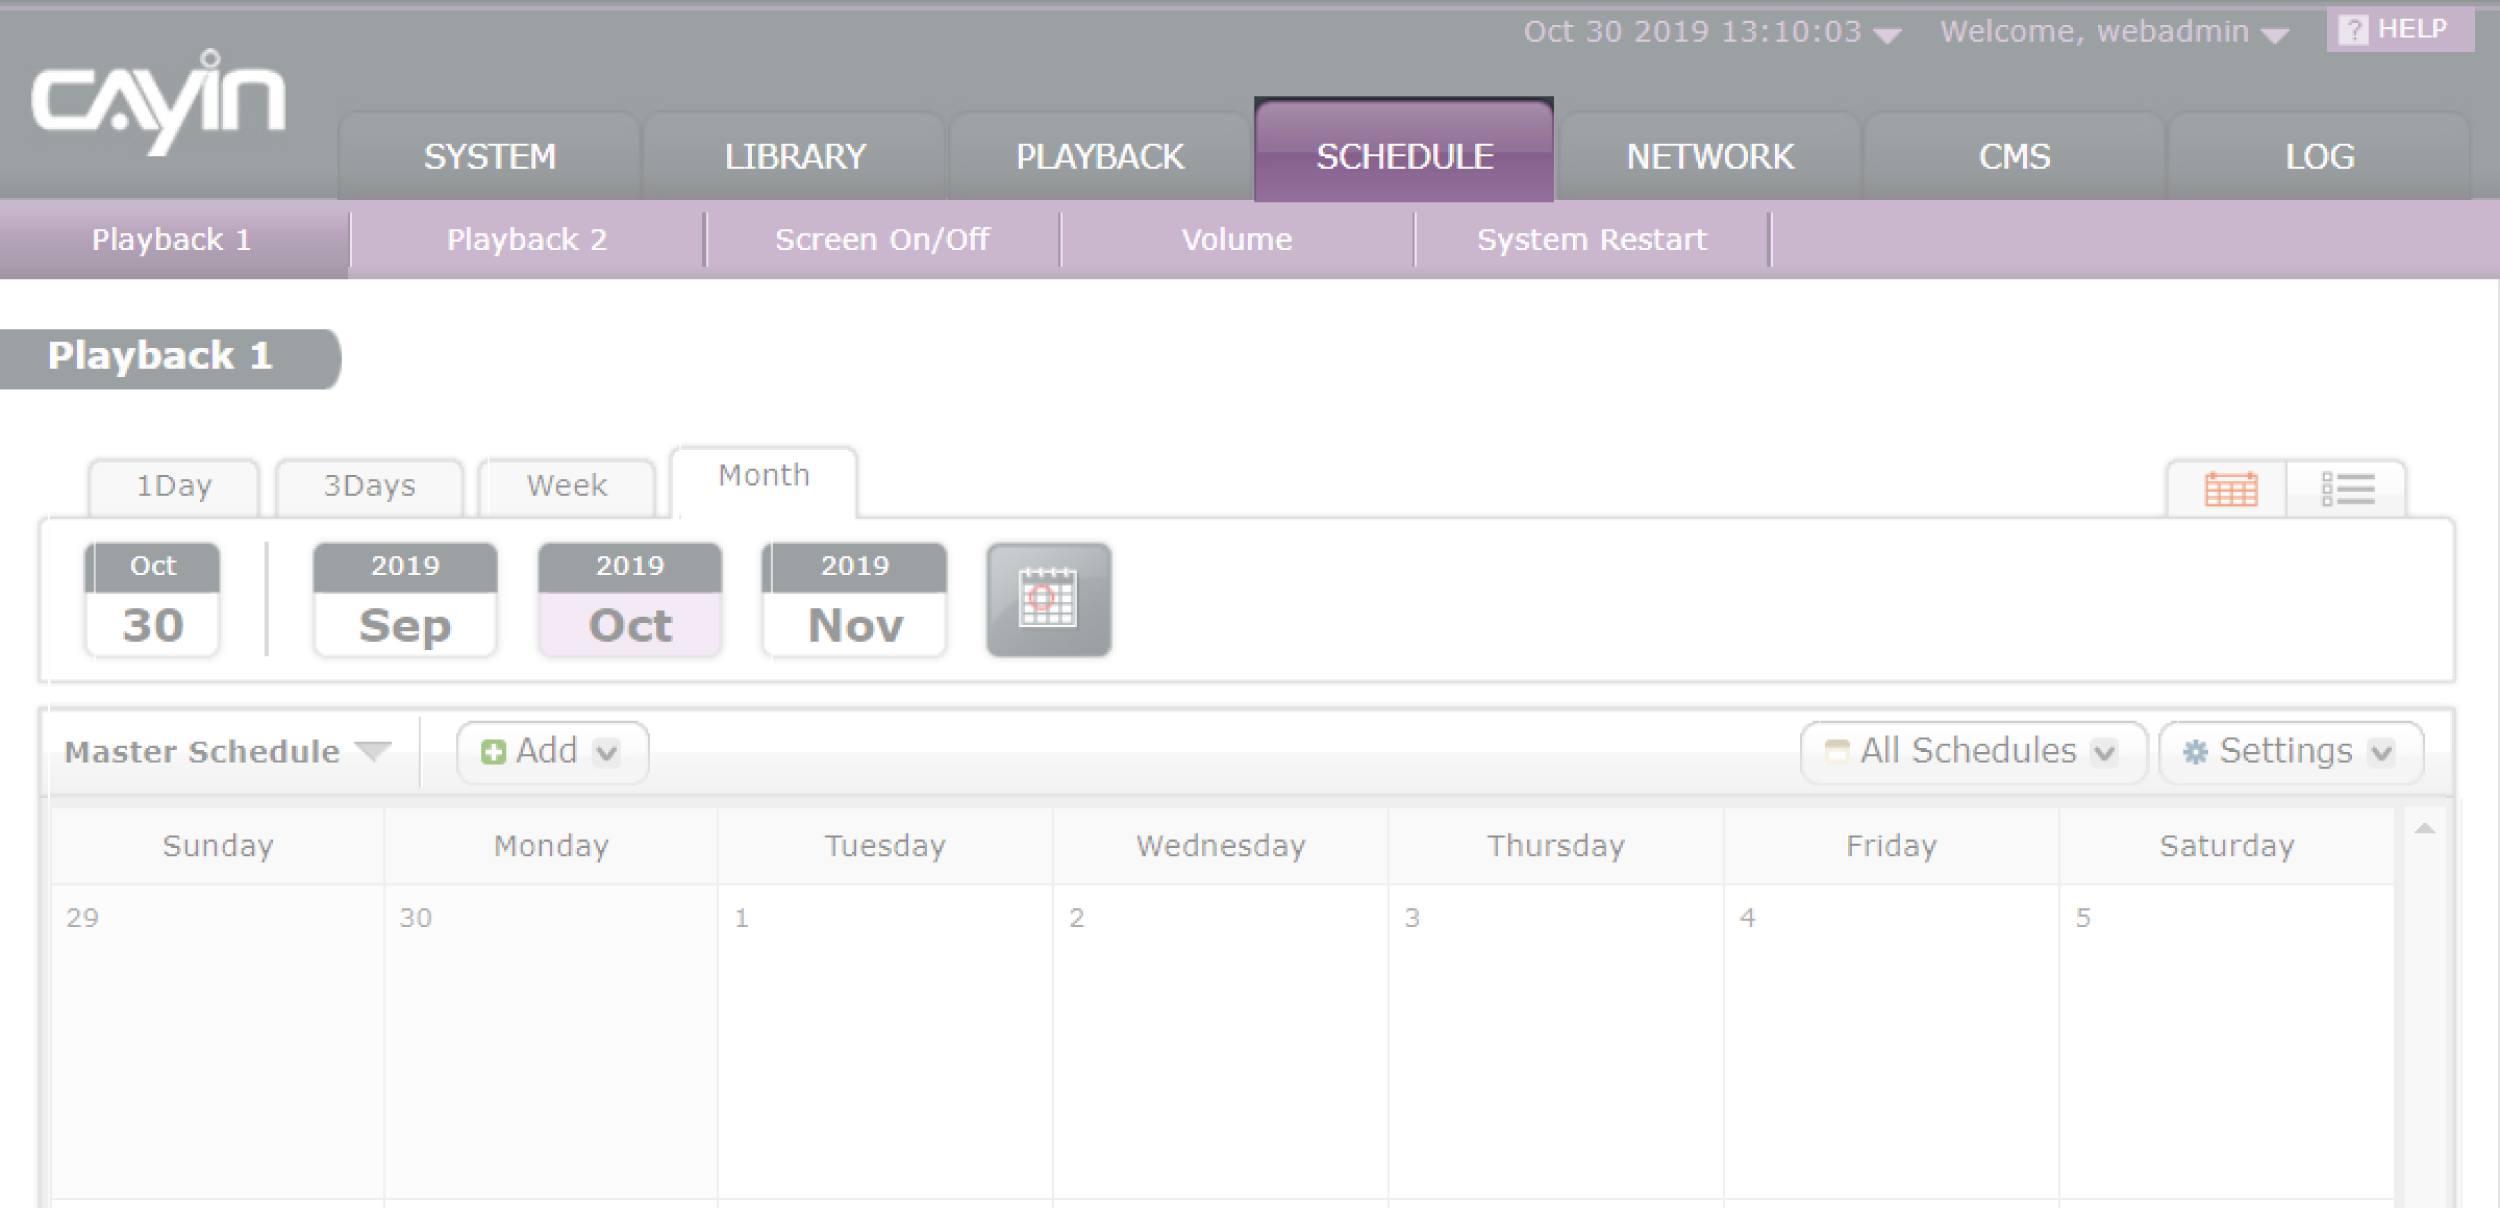
STEP 2 : Add a new schedule
Select Master Schedule, click Add and select a multimedia type in the drop-down menu. In this case, we choose Video to play video files in a skin with the full-screen video zone. Then you will go to the editing page.
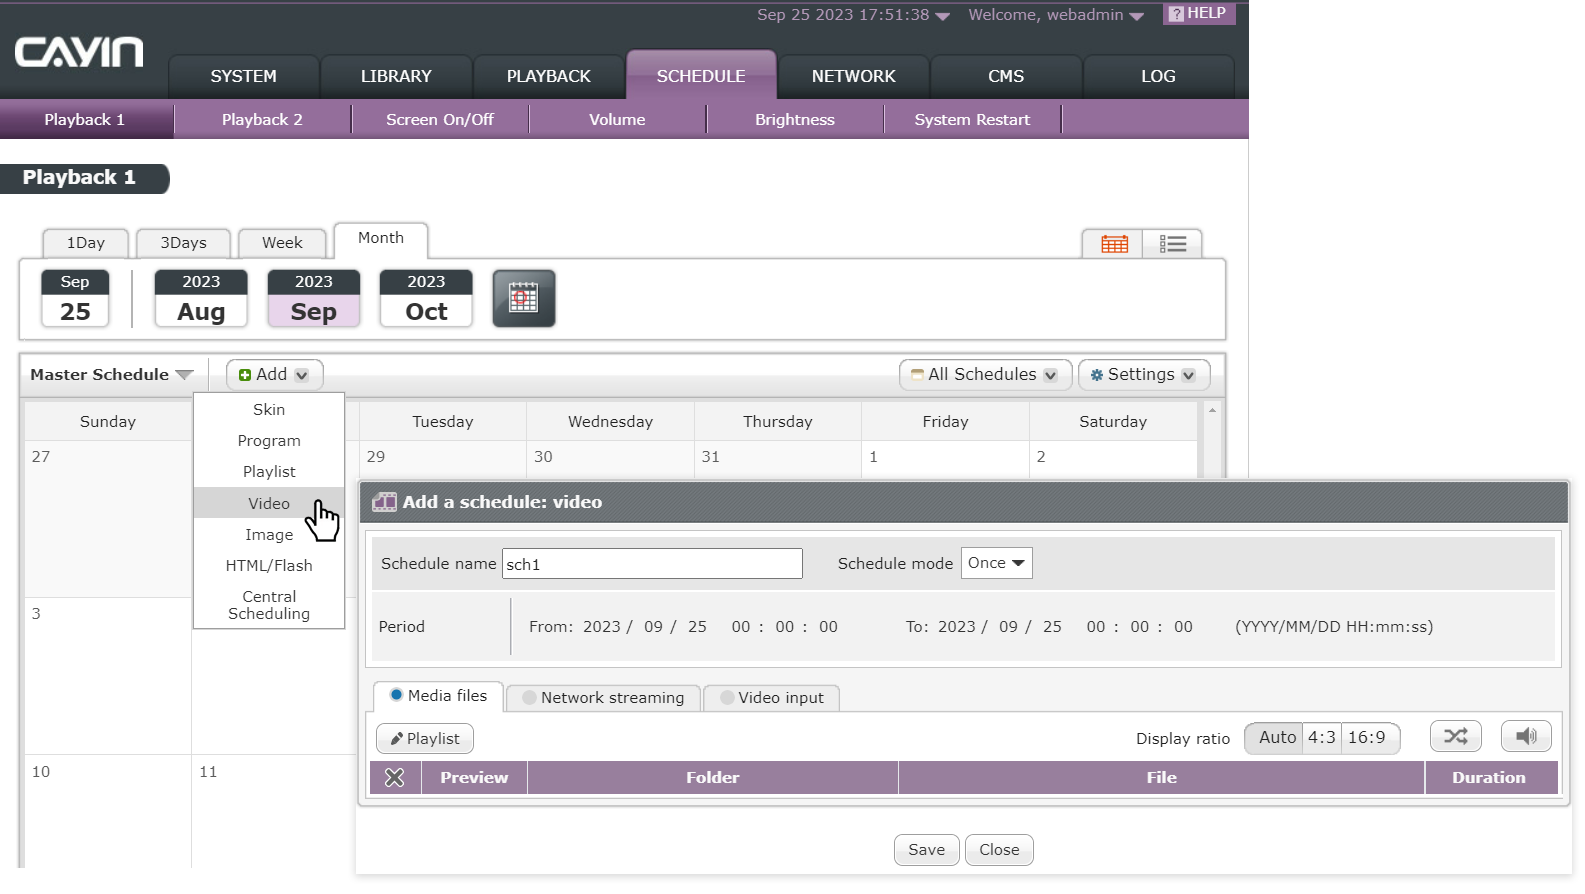
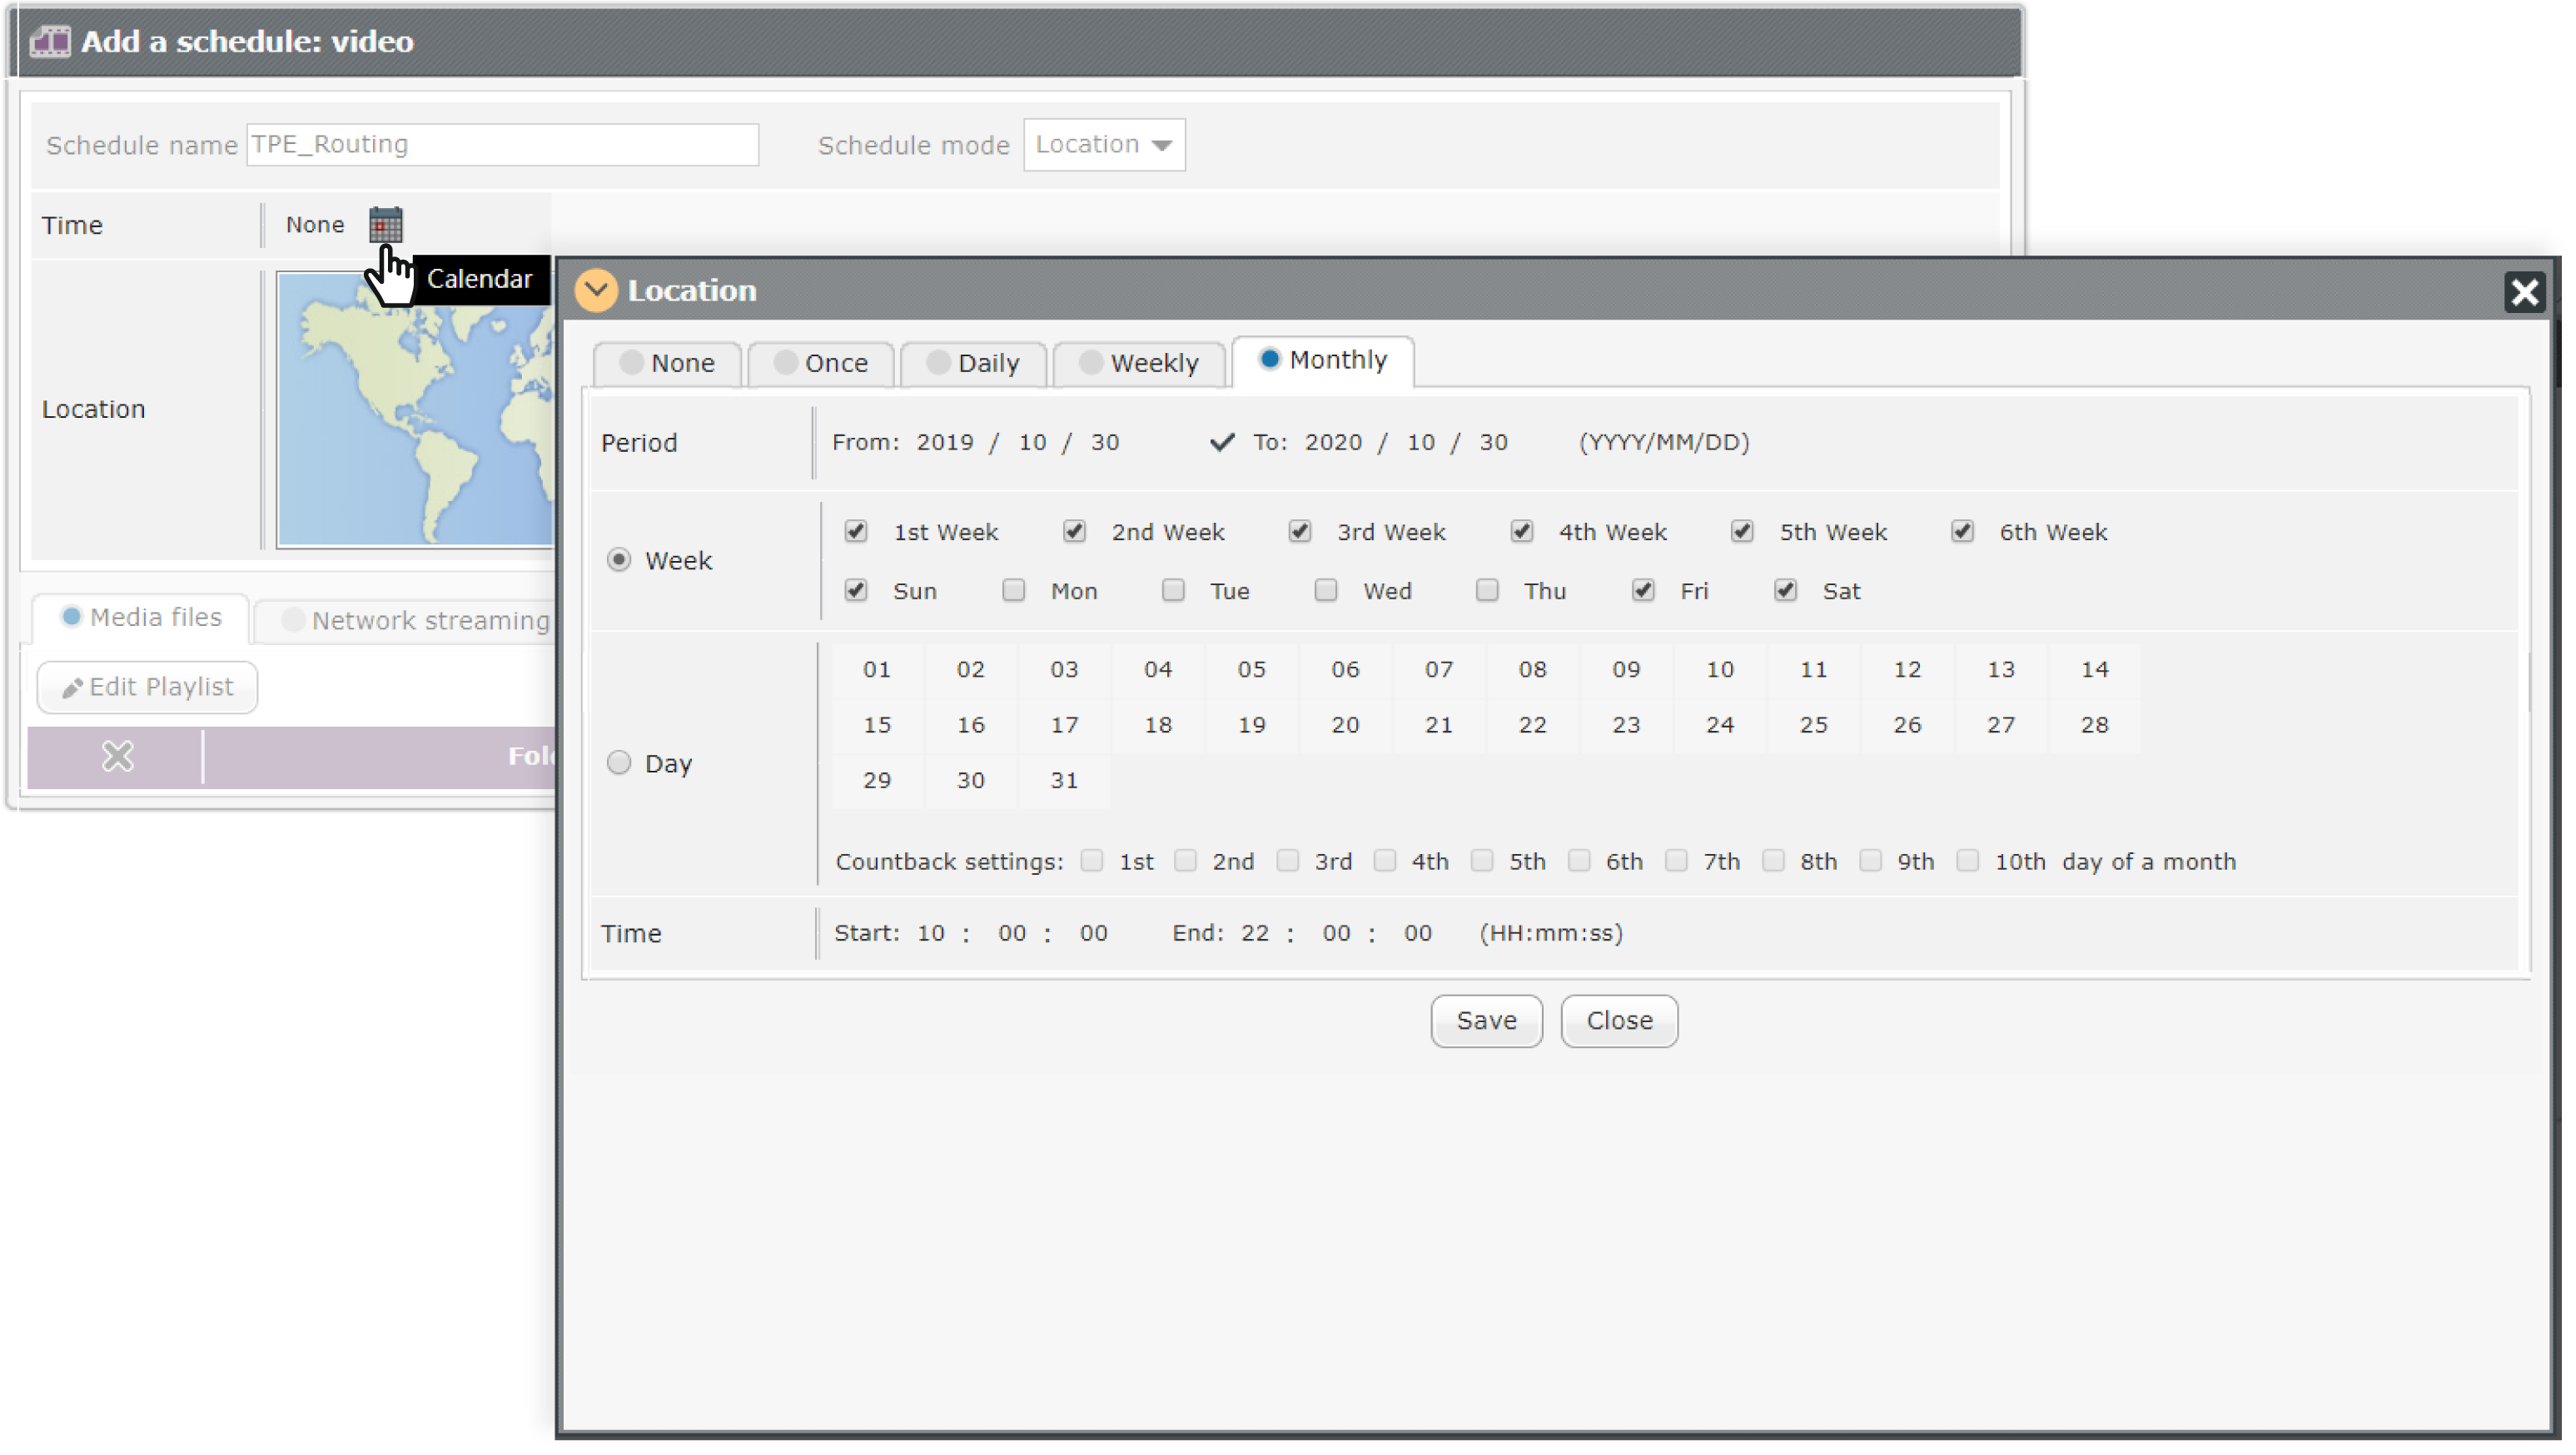
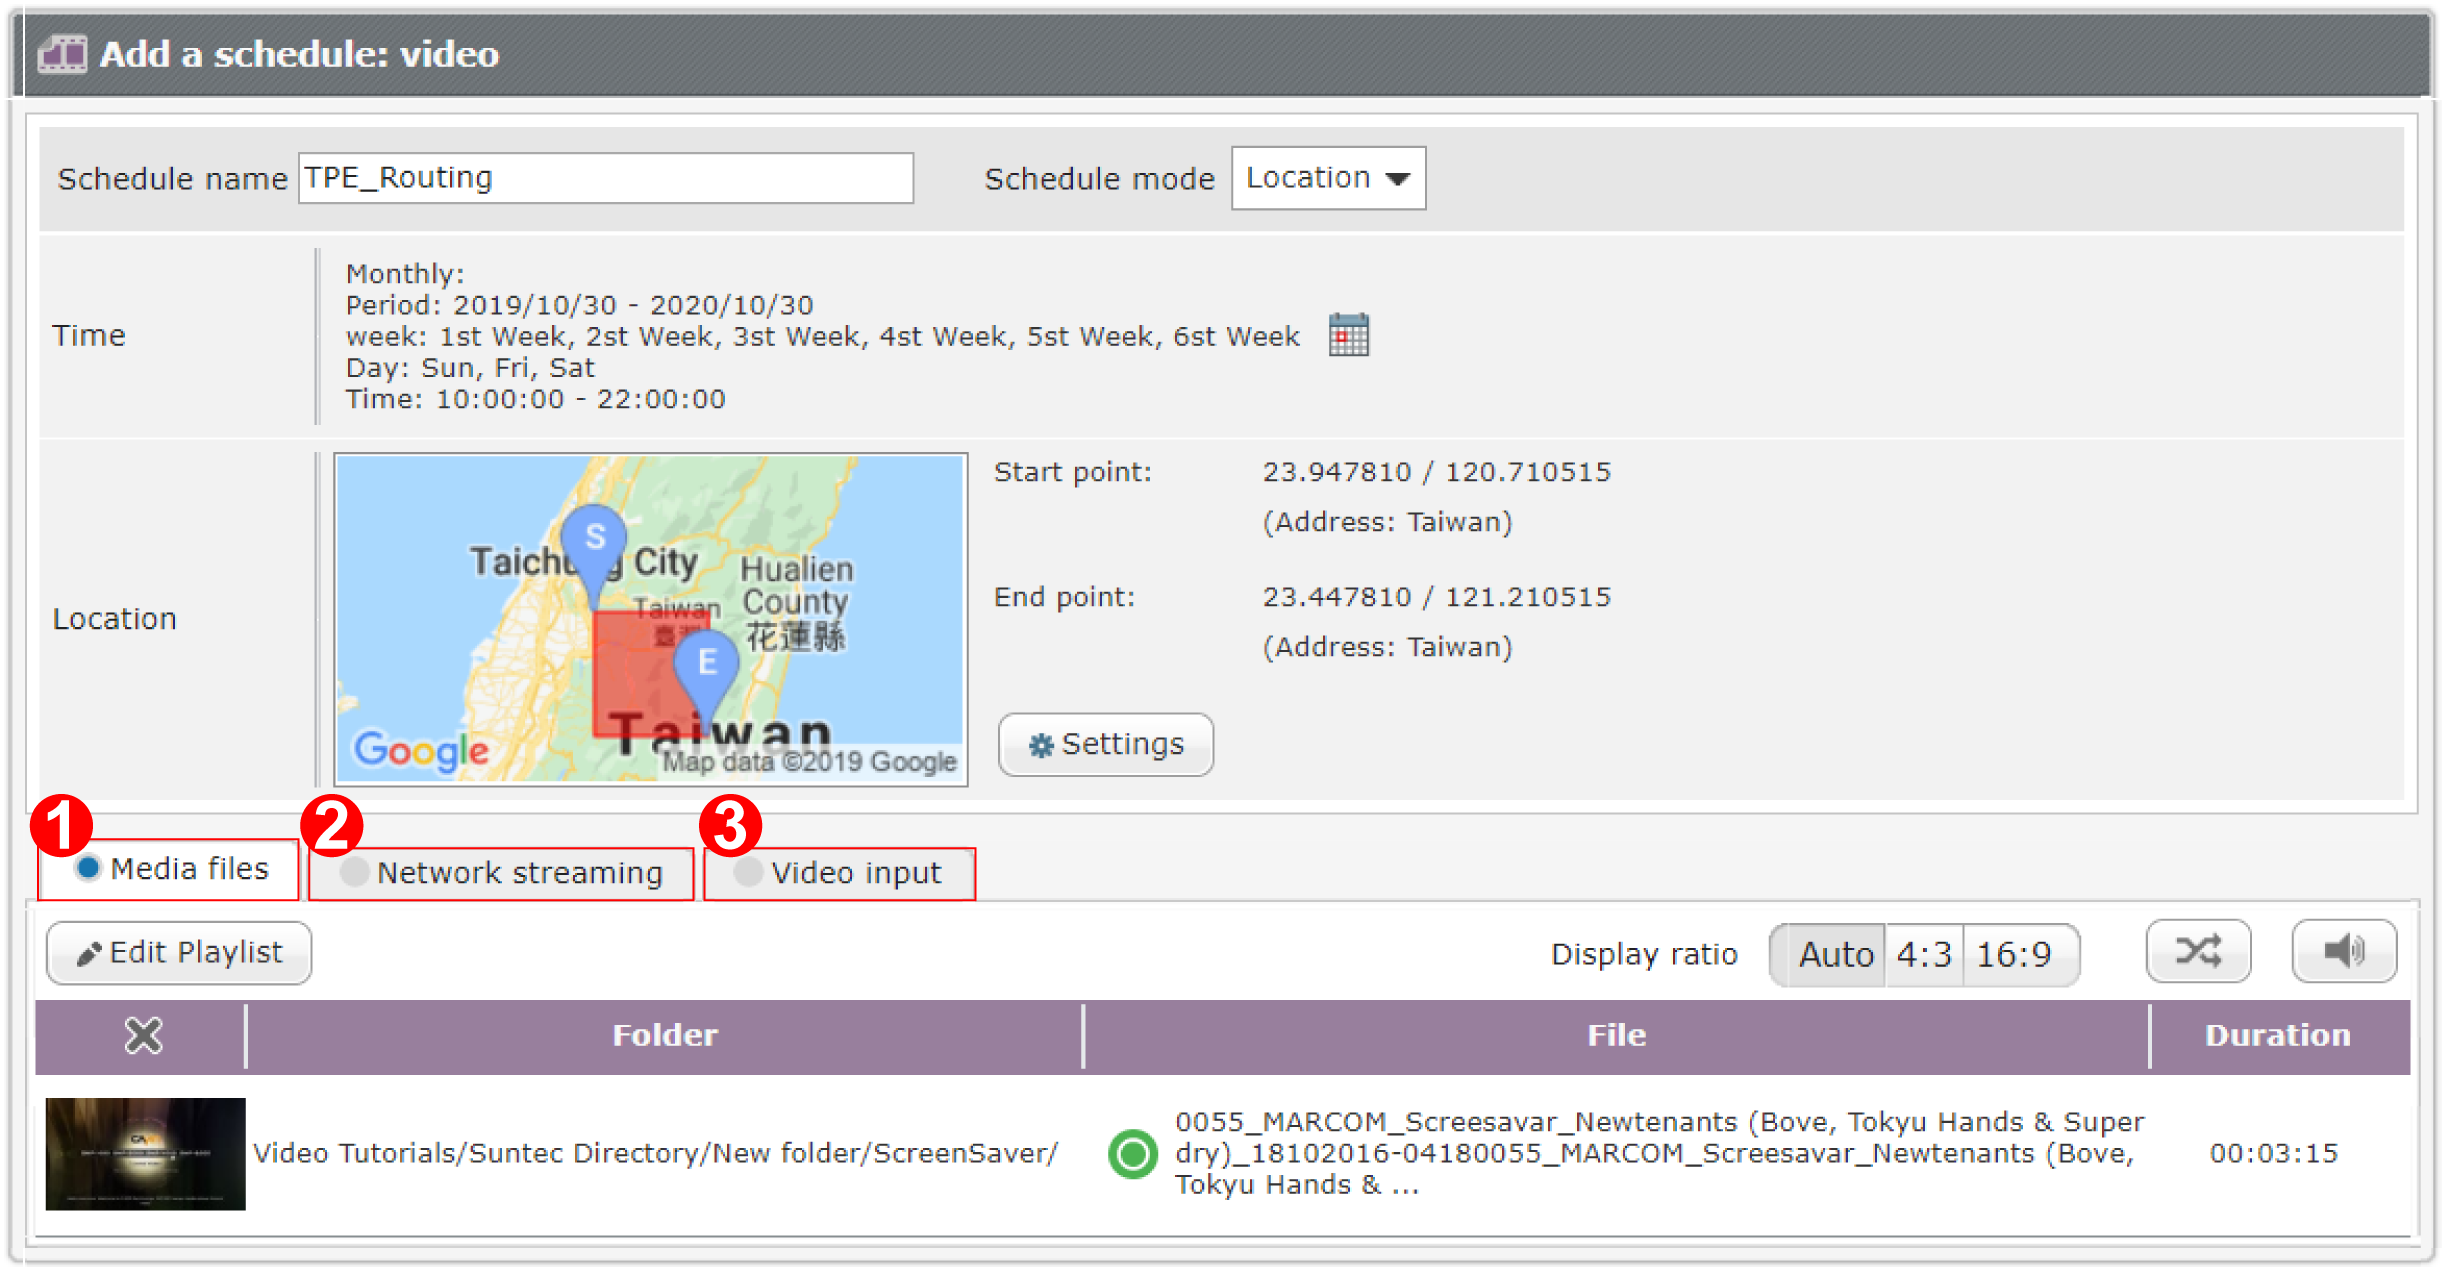
STEP 3 : Enter basic information
Fill in the Schedule Name. Then, select Location in the drop-down menu of Schedule mode.
STEP 4 : Assign deployment time
Click the calendar icon ![]() , to specify the date and time when this
campaign will be run. You
can play the contents once, daily, weekly, or monthly.
, to specify the date and time when this
campaign will be run. You
can play the contents once, daily, weekly, or monthly.
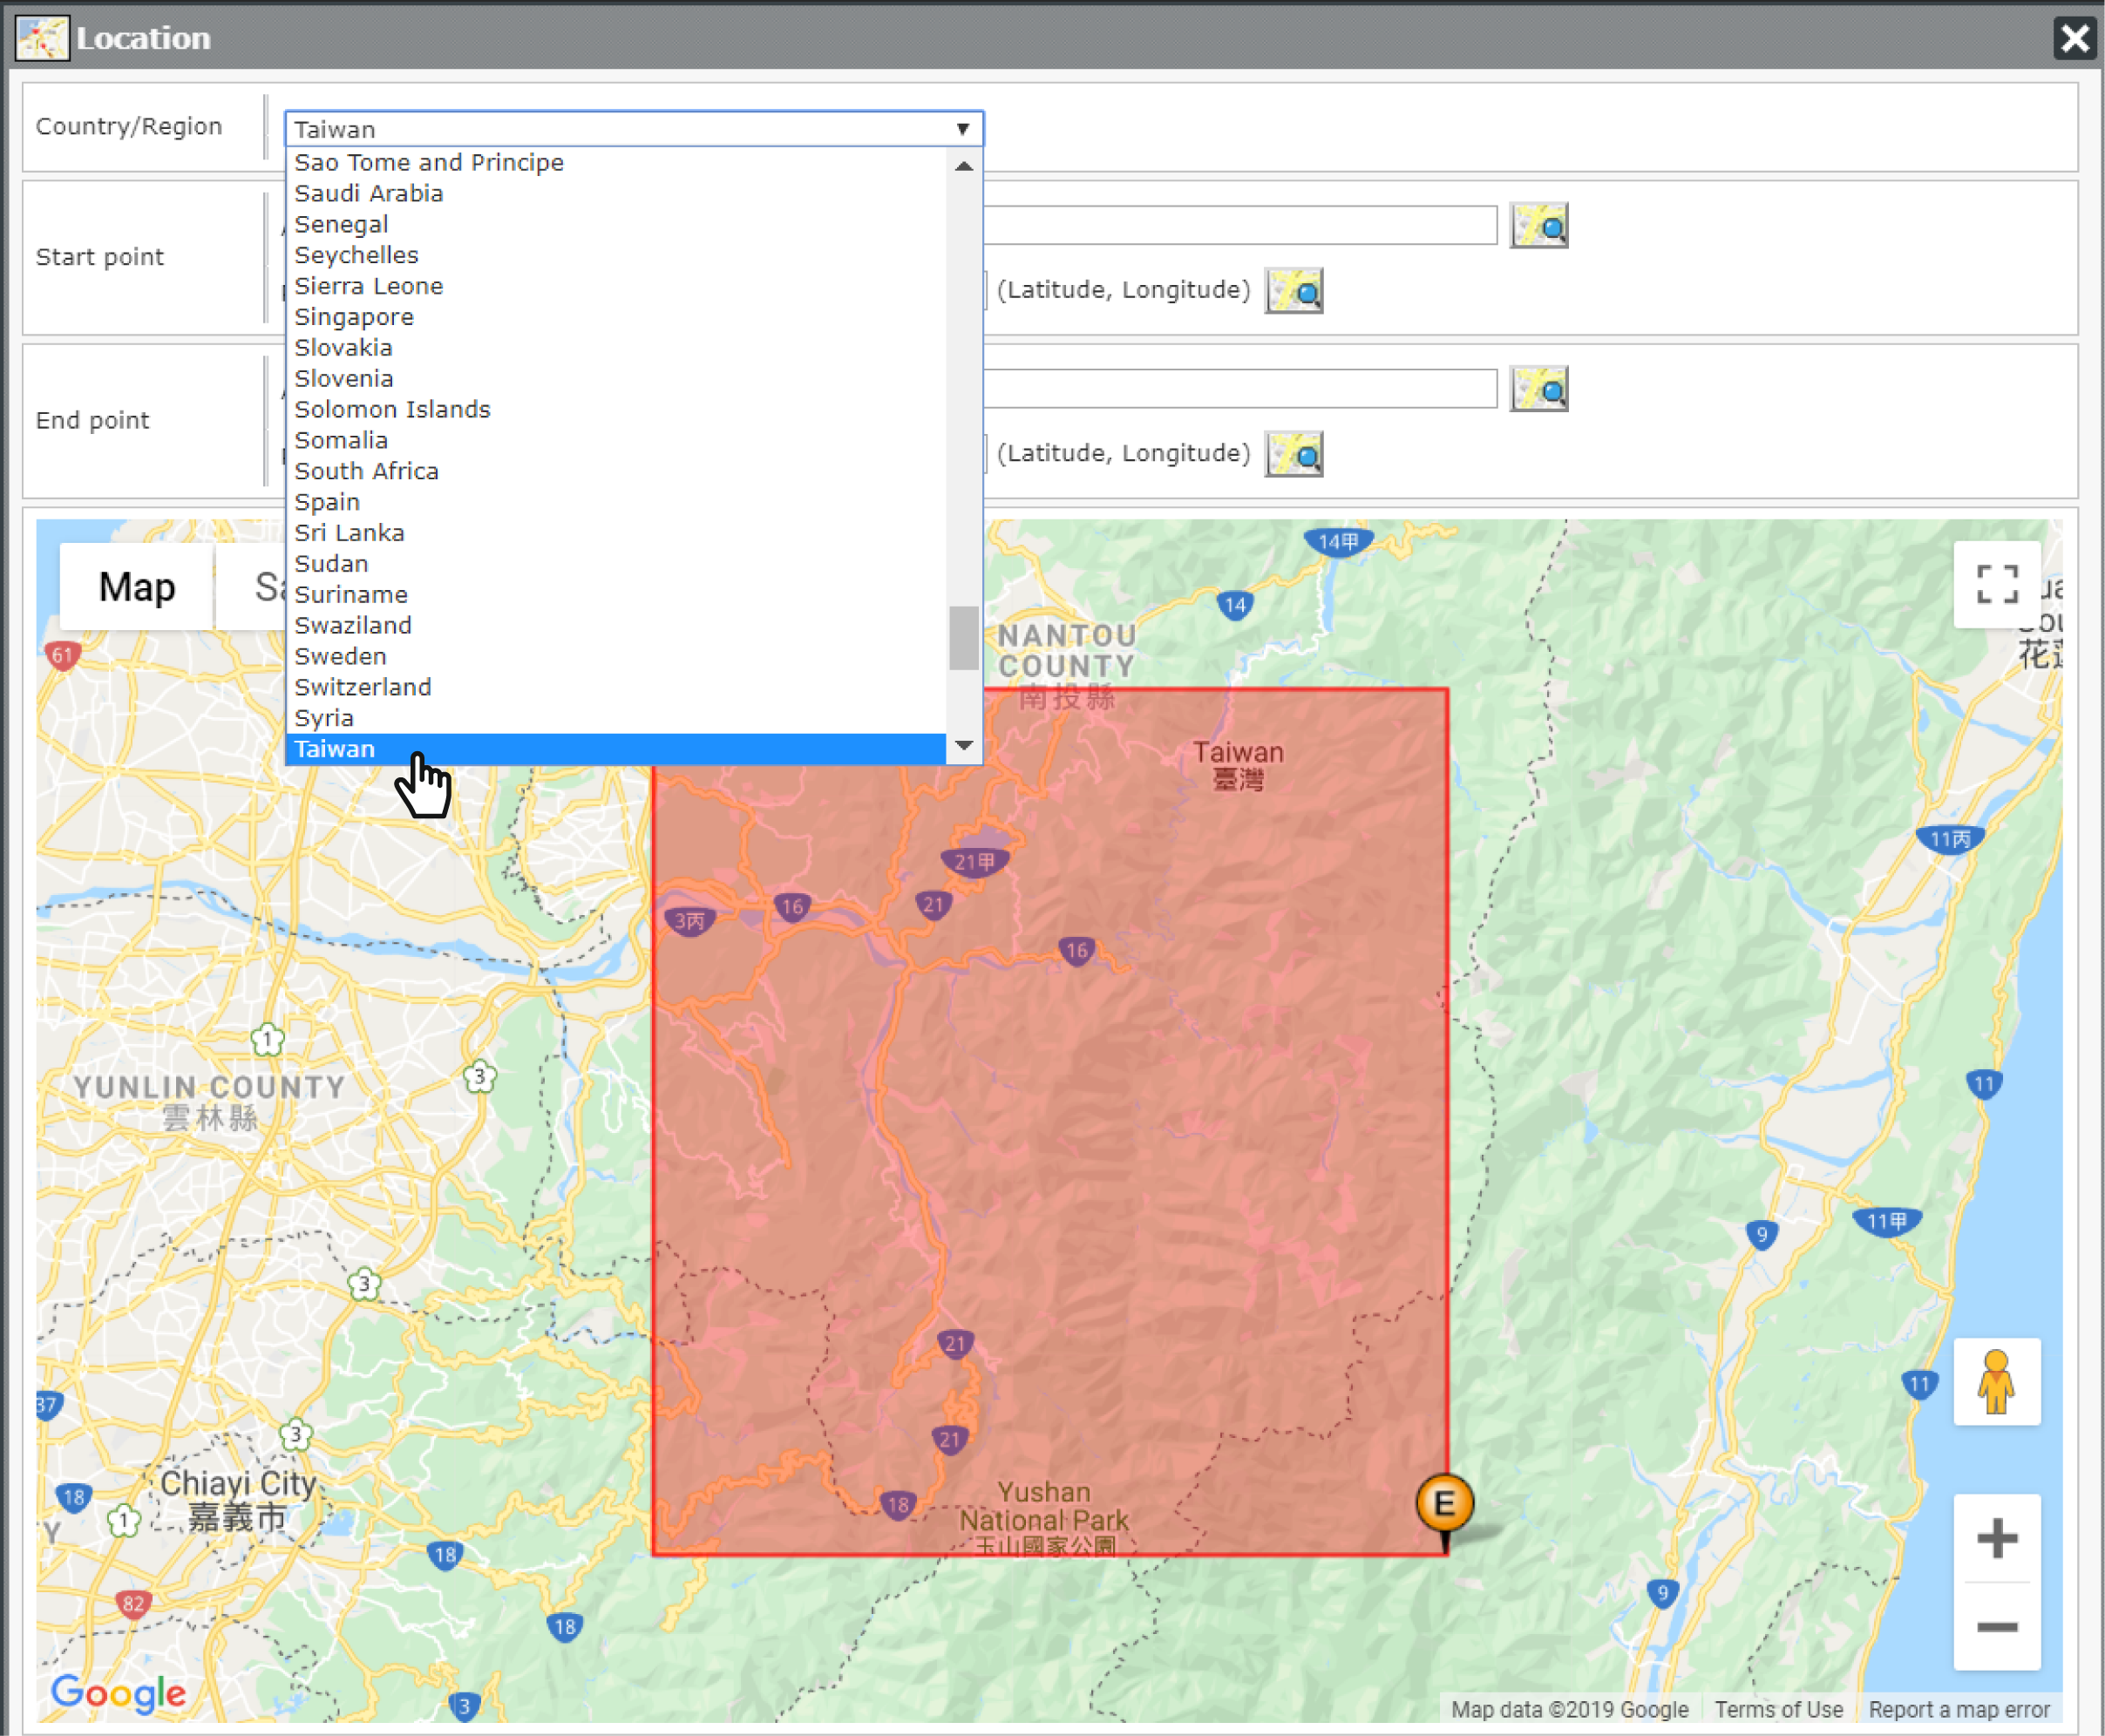
STEP 5 : Assign alocation
Click
 and set an area where this schedule will be
played when
the SMP player is located within this designated zone. Select a country and you will
see Google Maps showing below.
and set an area where this schedule will be
played when
the SMP player is located within this designated zone. Select a country and you will
see Google Maps showing below.
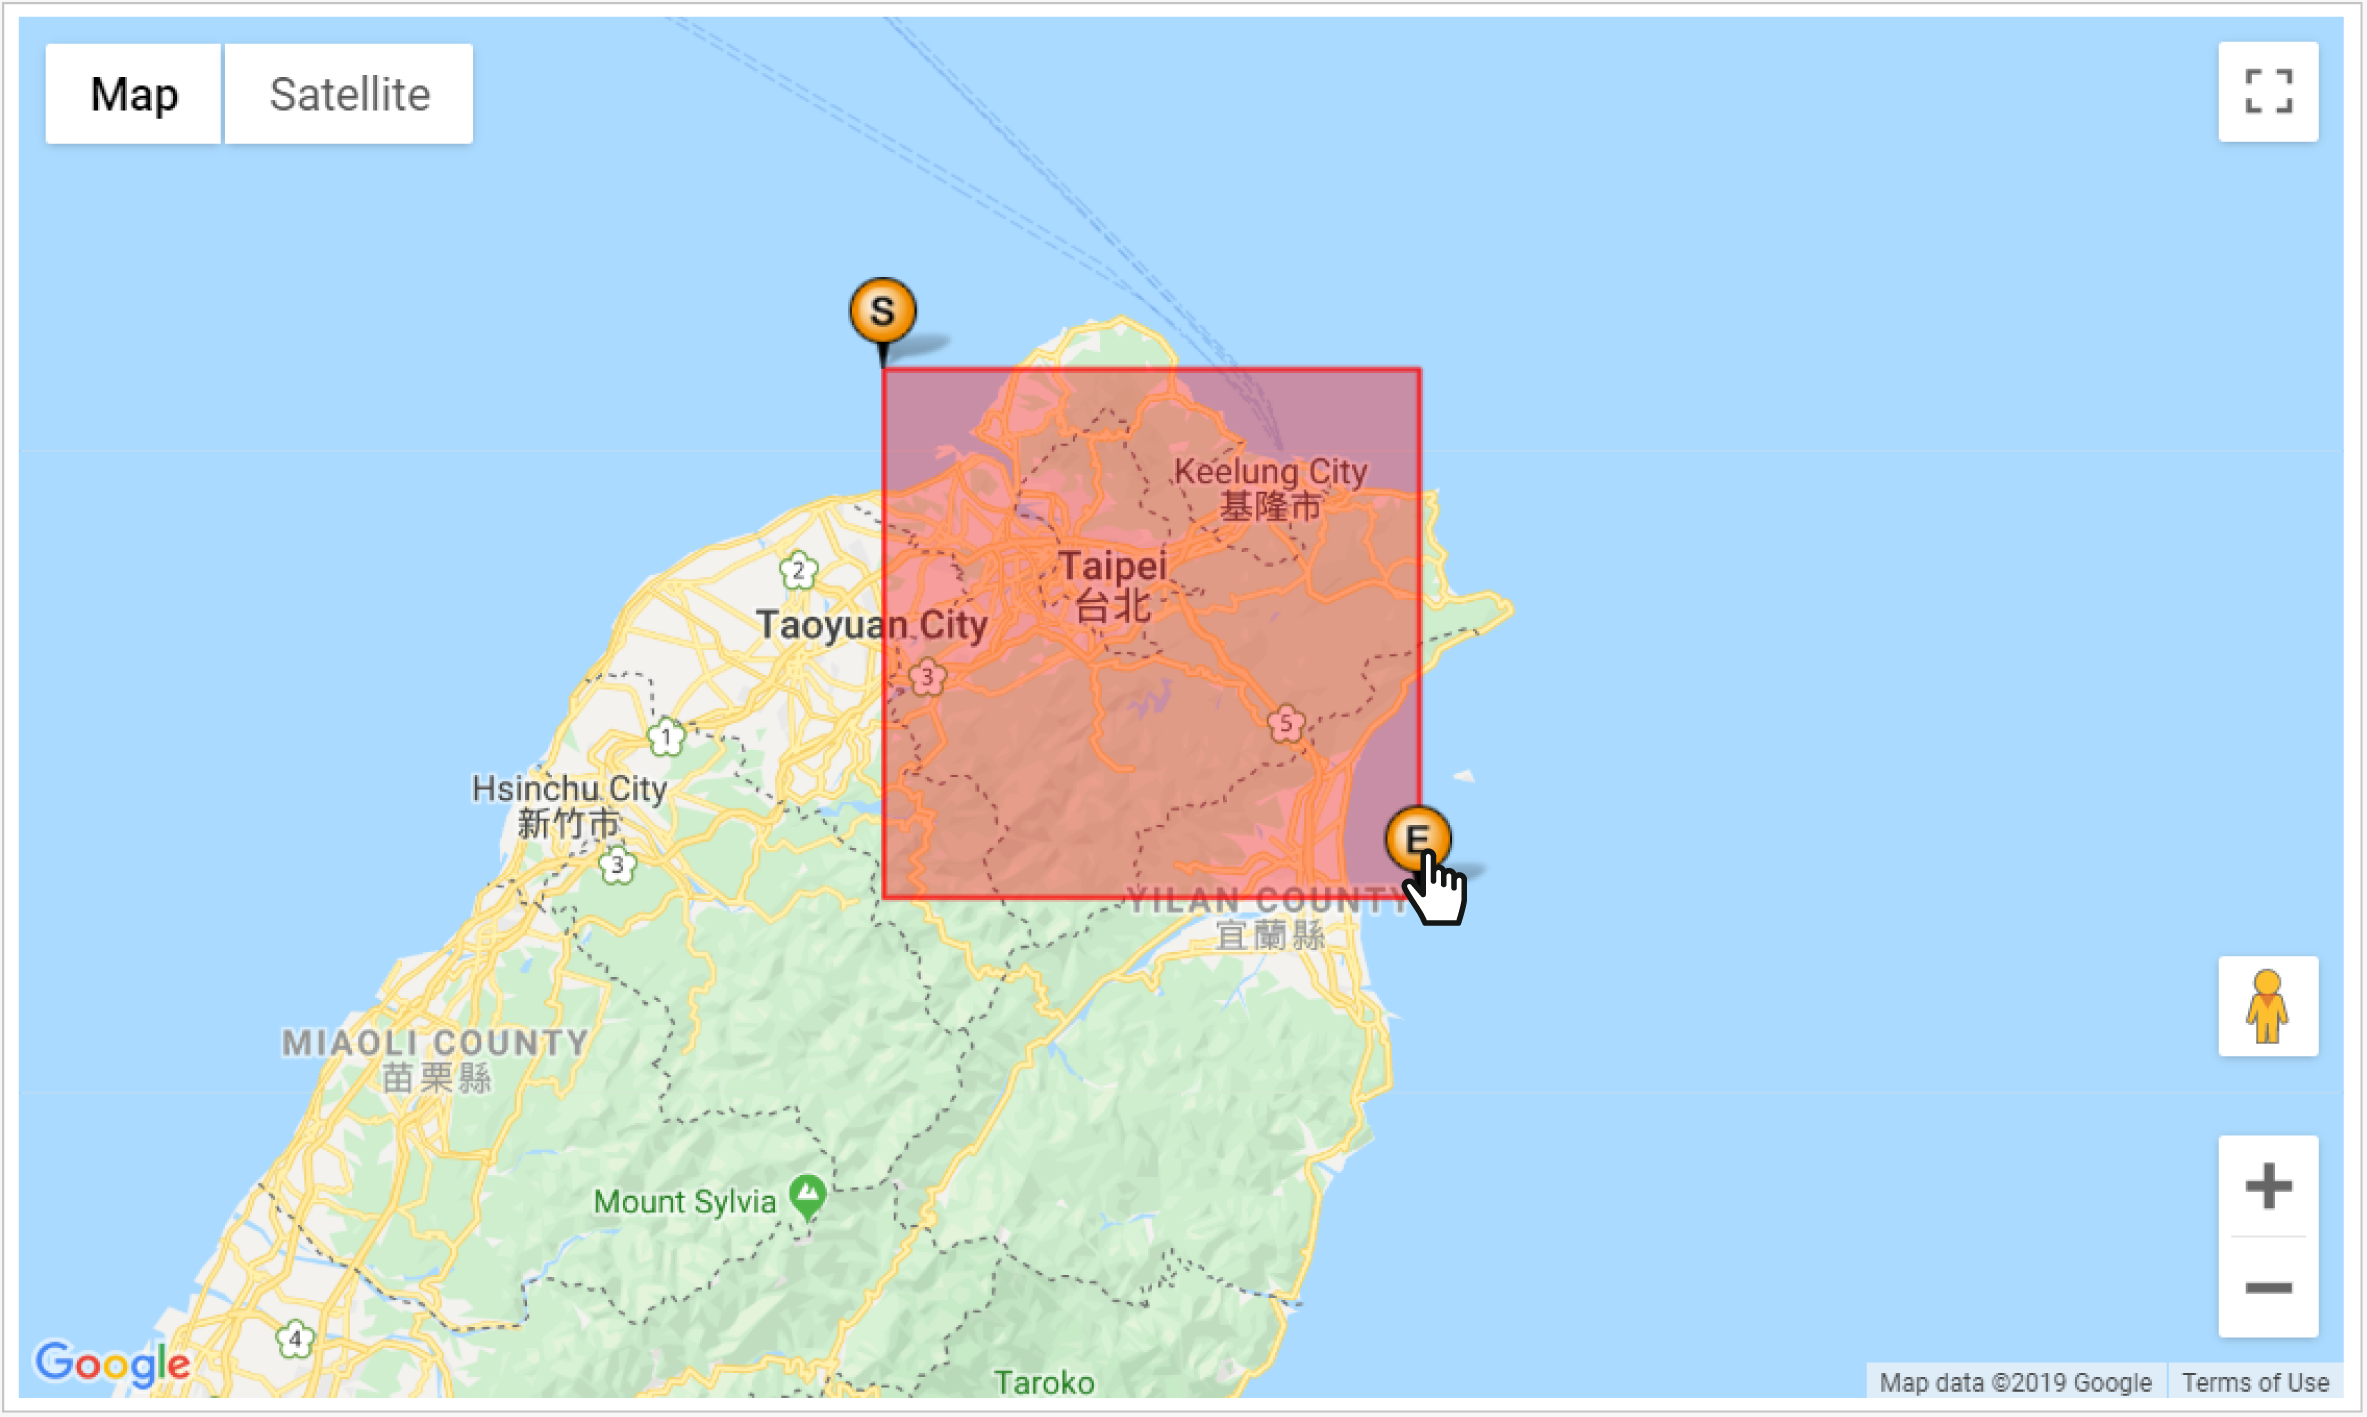
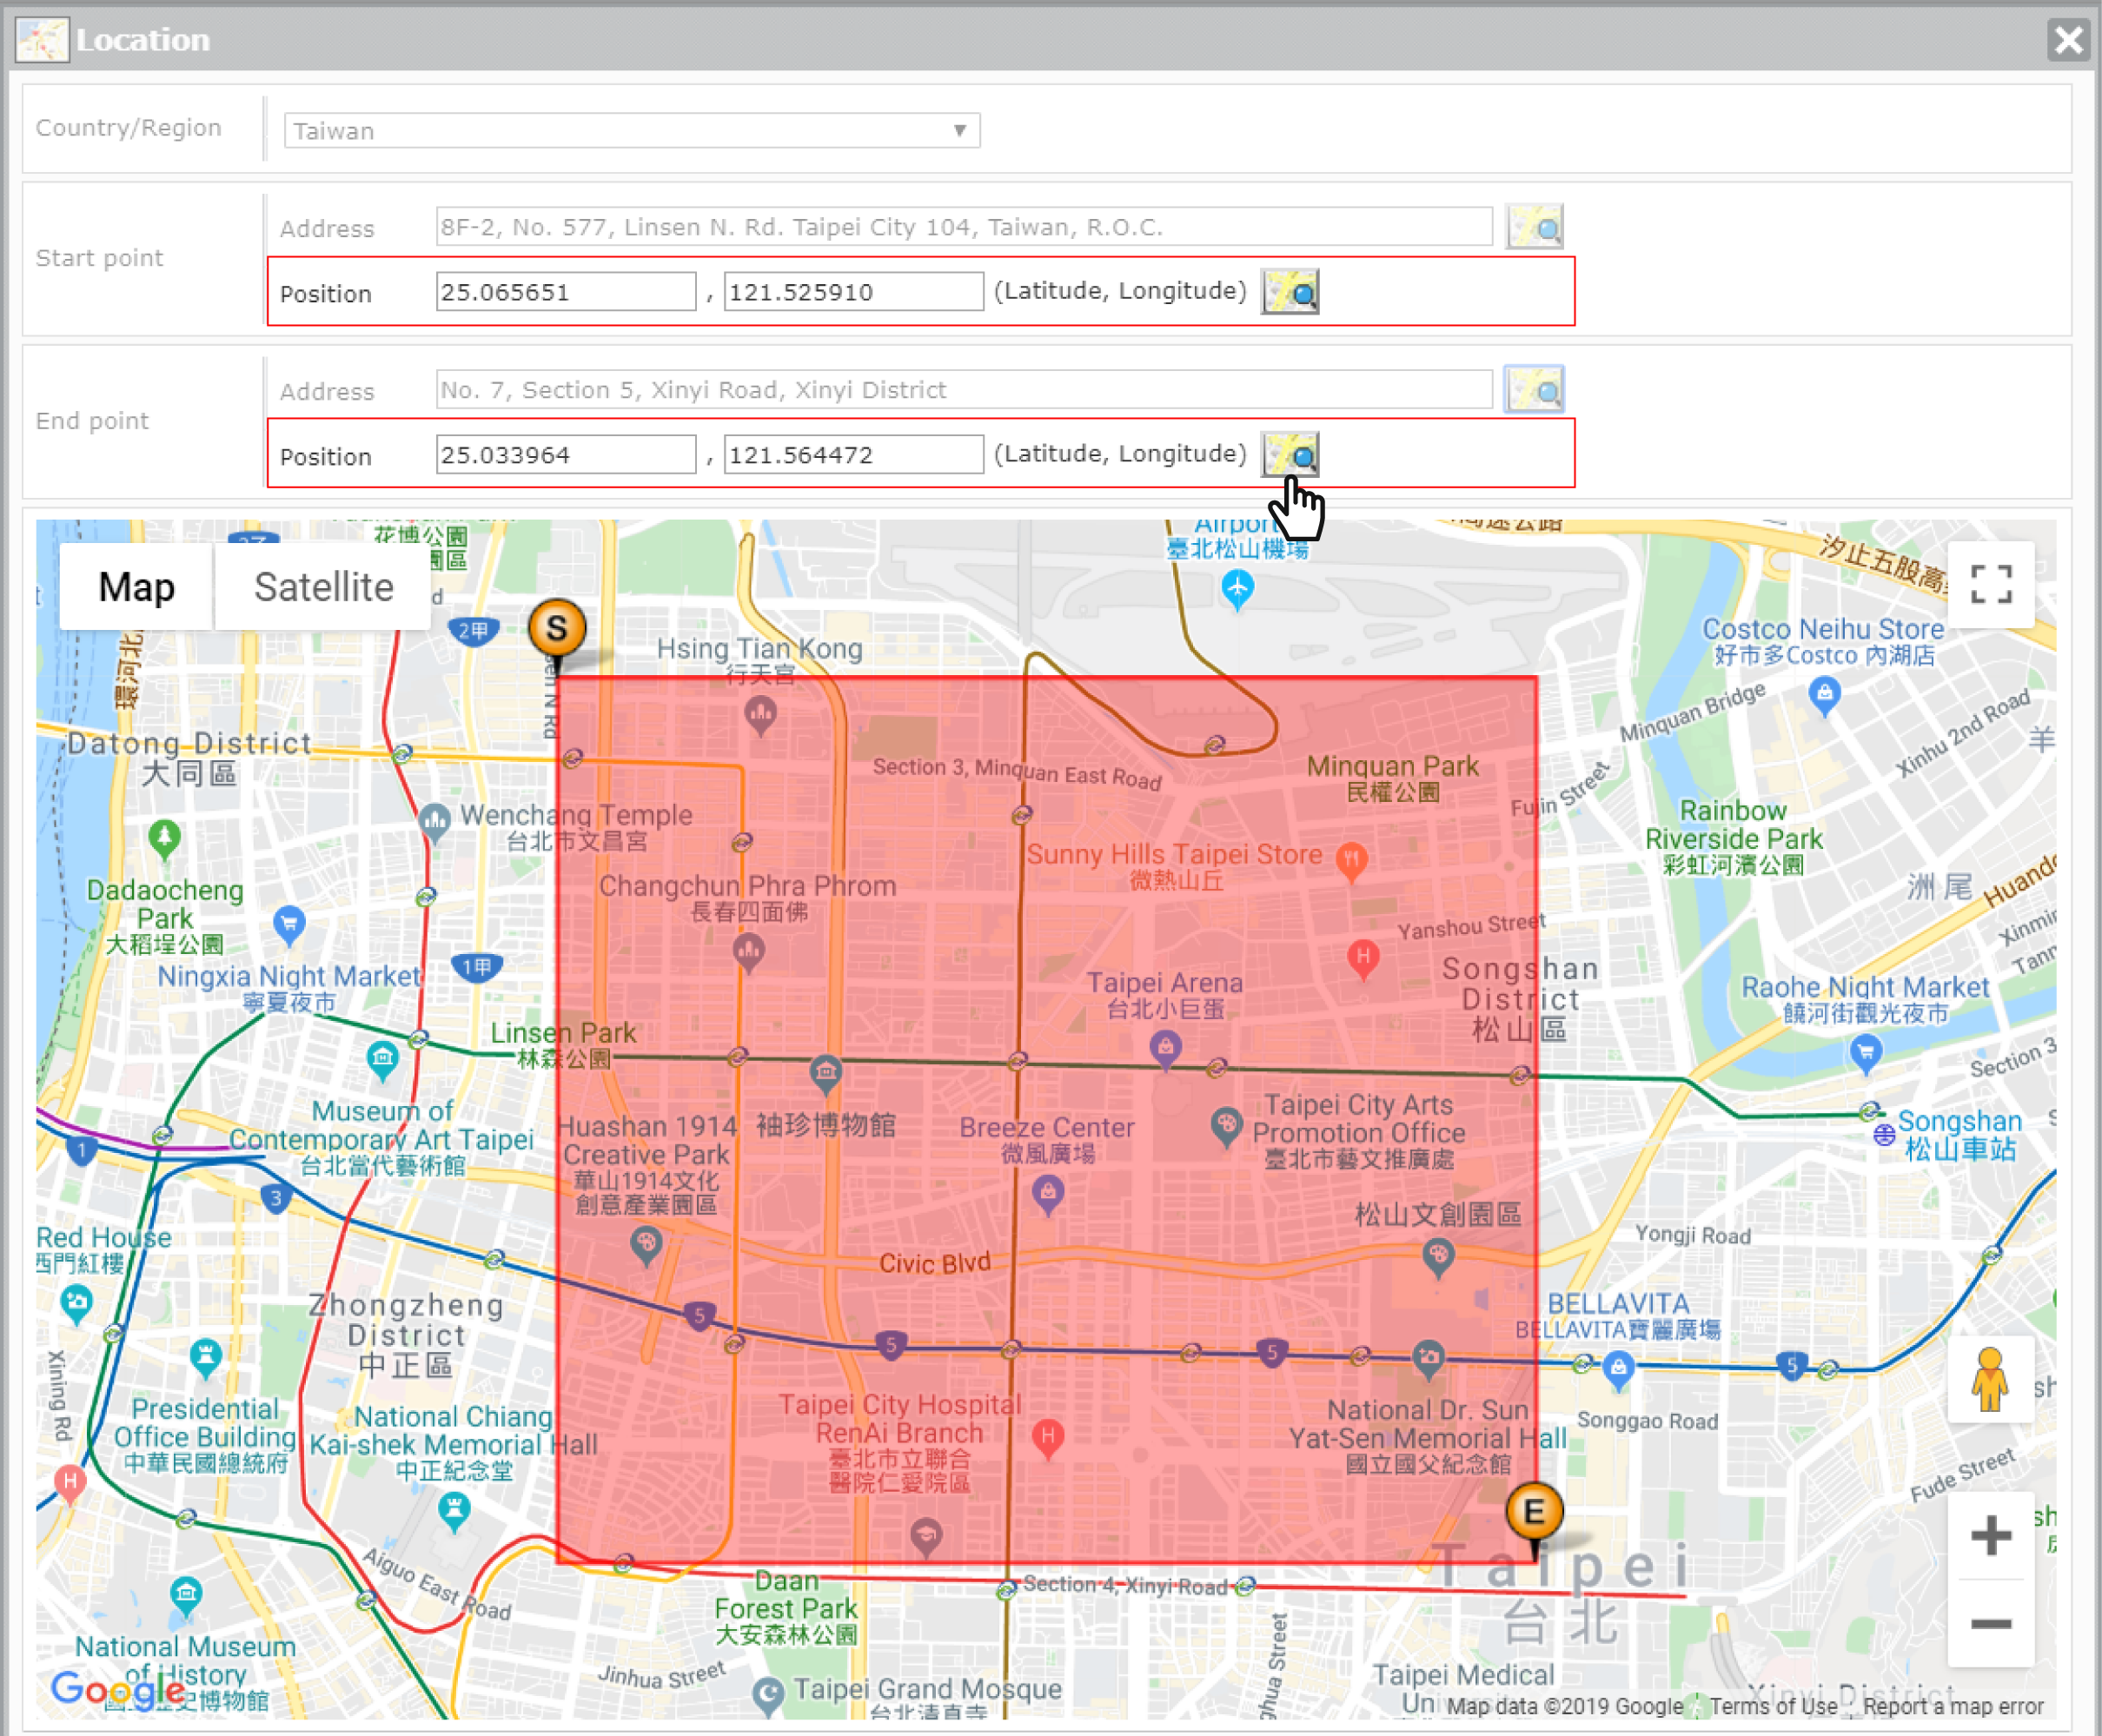
There are three ways for you to set the start and end points of this area:
- Drag
 (start point) and
  (endpoint) directly on
the map.
(endpoint) directly on
the map.
- Enter the address and click
 .
.
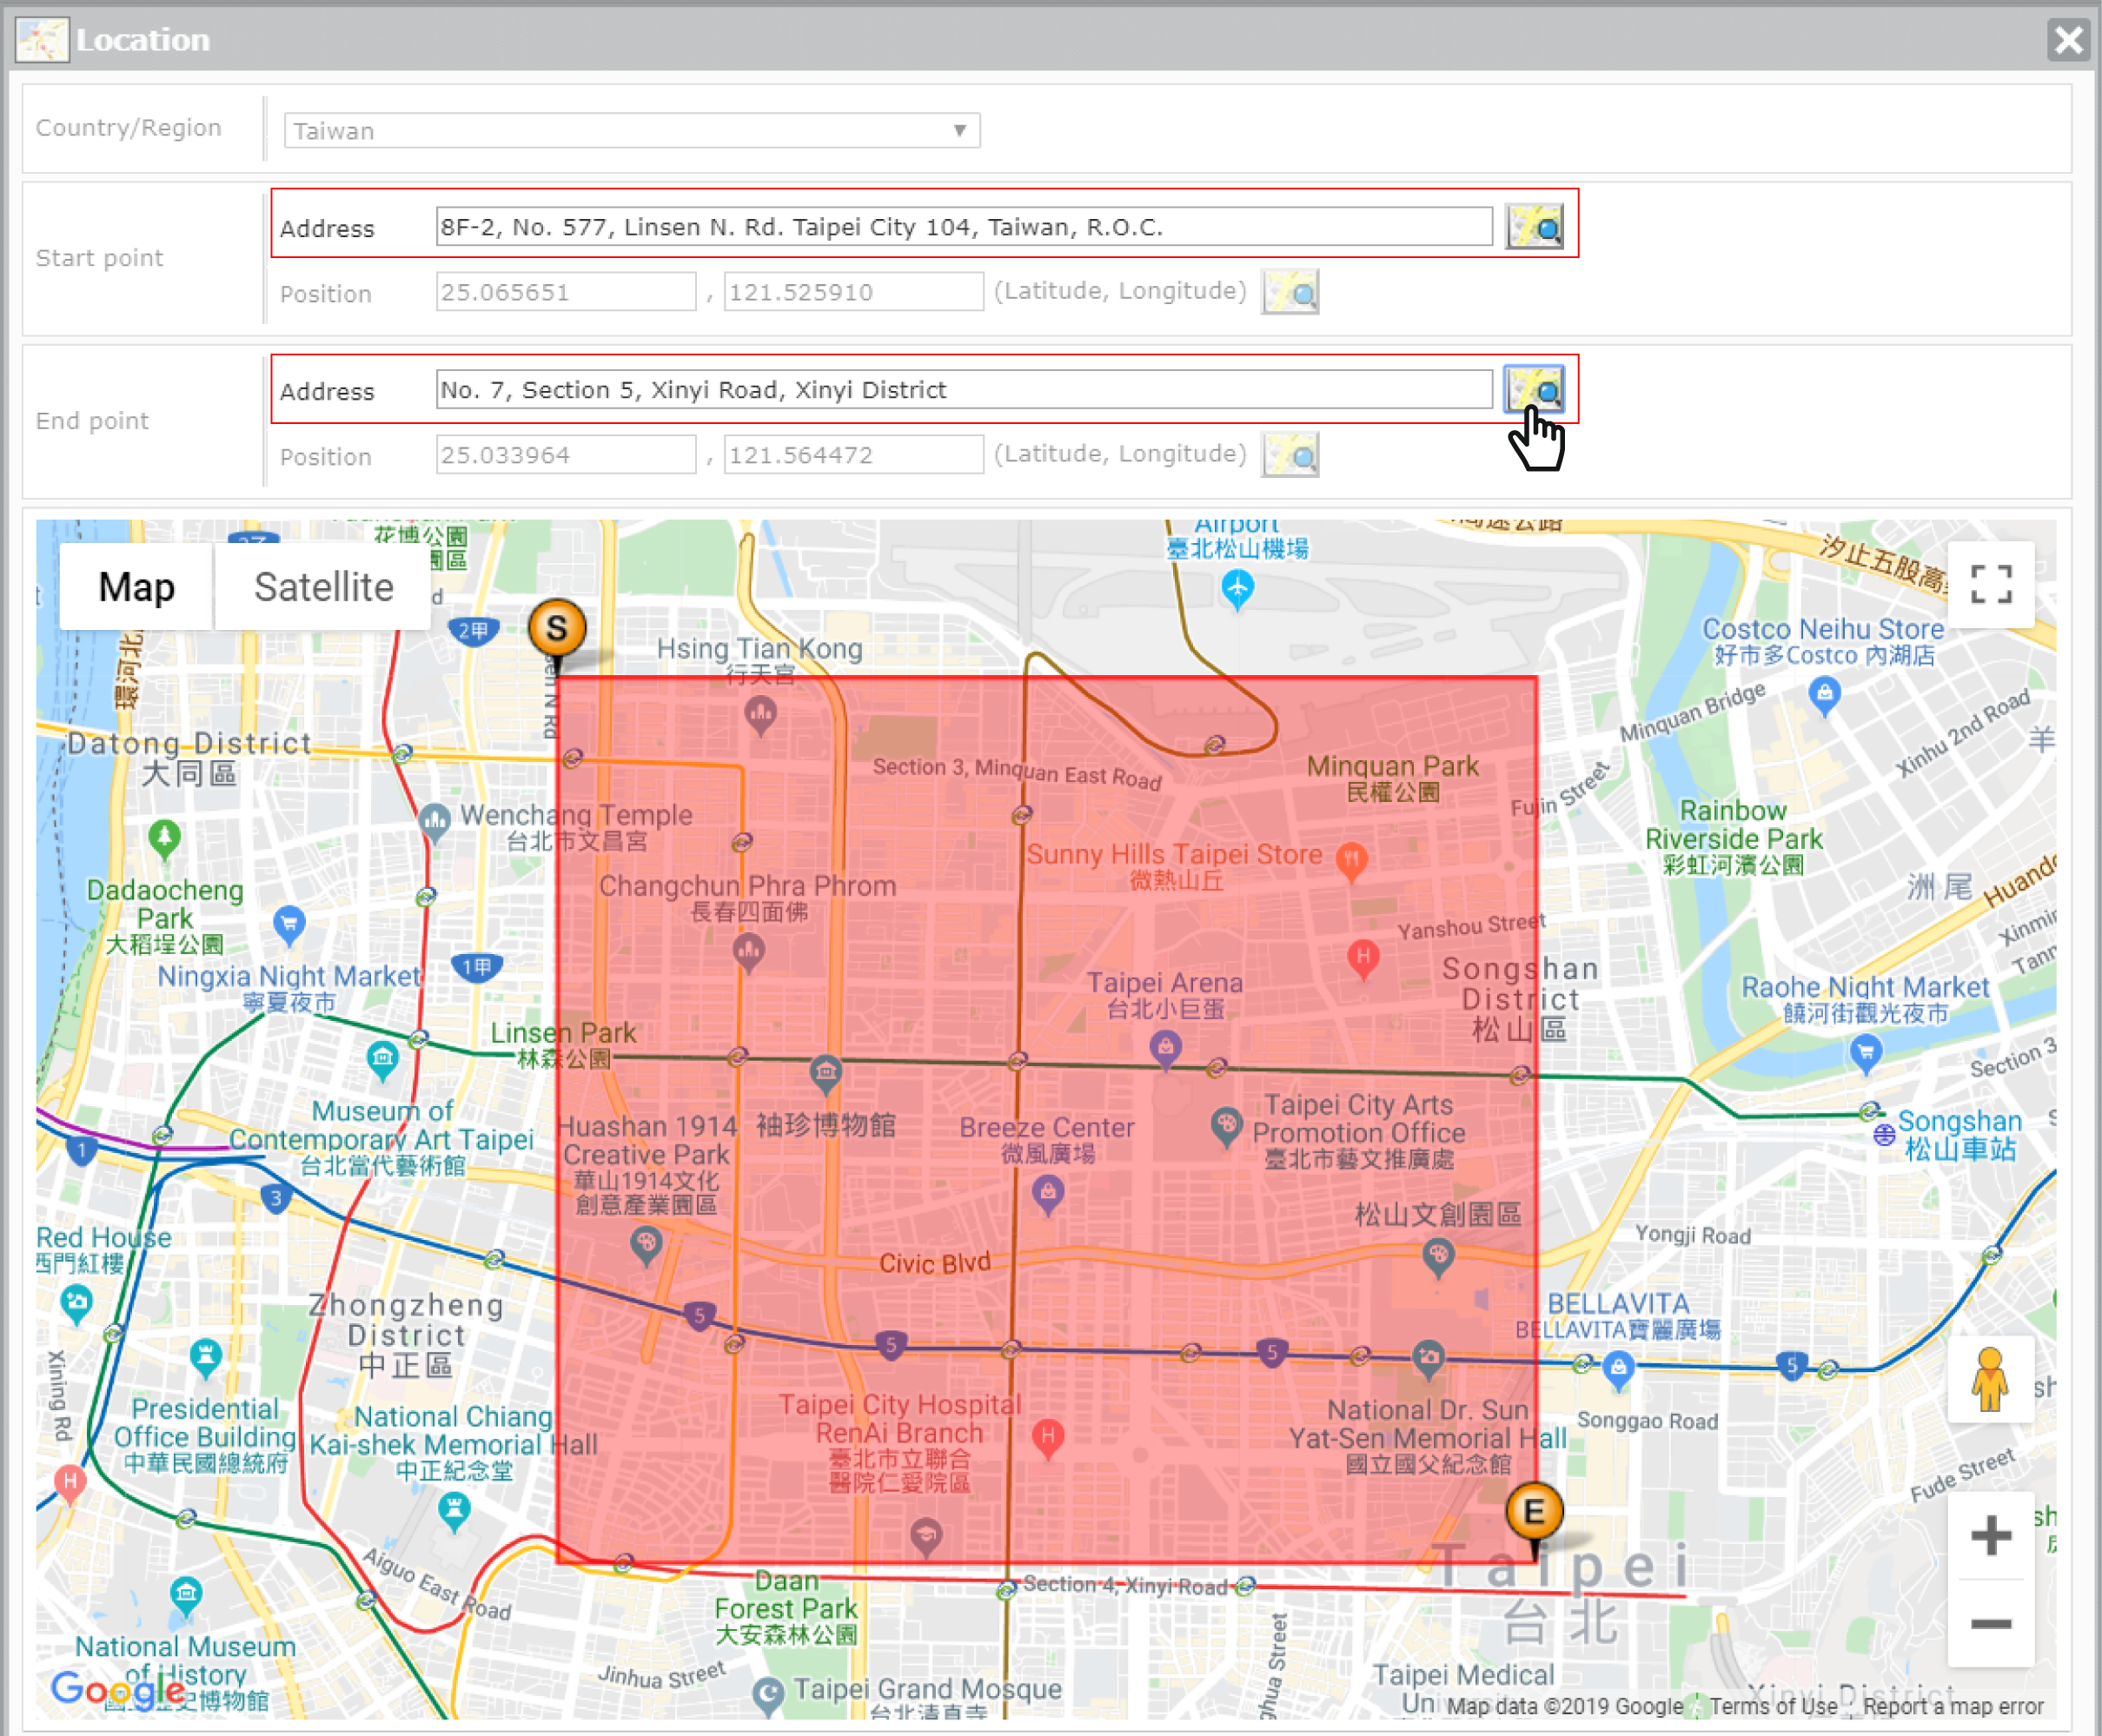
- Enter the latitude and longitude and click .
STEP 6 : Select a content
Assign contents which you want to play in this campaign.
- You can choose to play videos from a streaming server or the video-in port.
- You can also play Media files stored in the Media folder, and create a playlist, controlling the order of multiple video files.
Please refer to Online Help if you need assistance with playback settings.
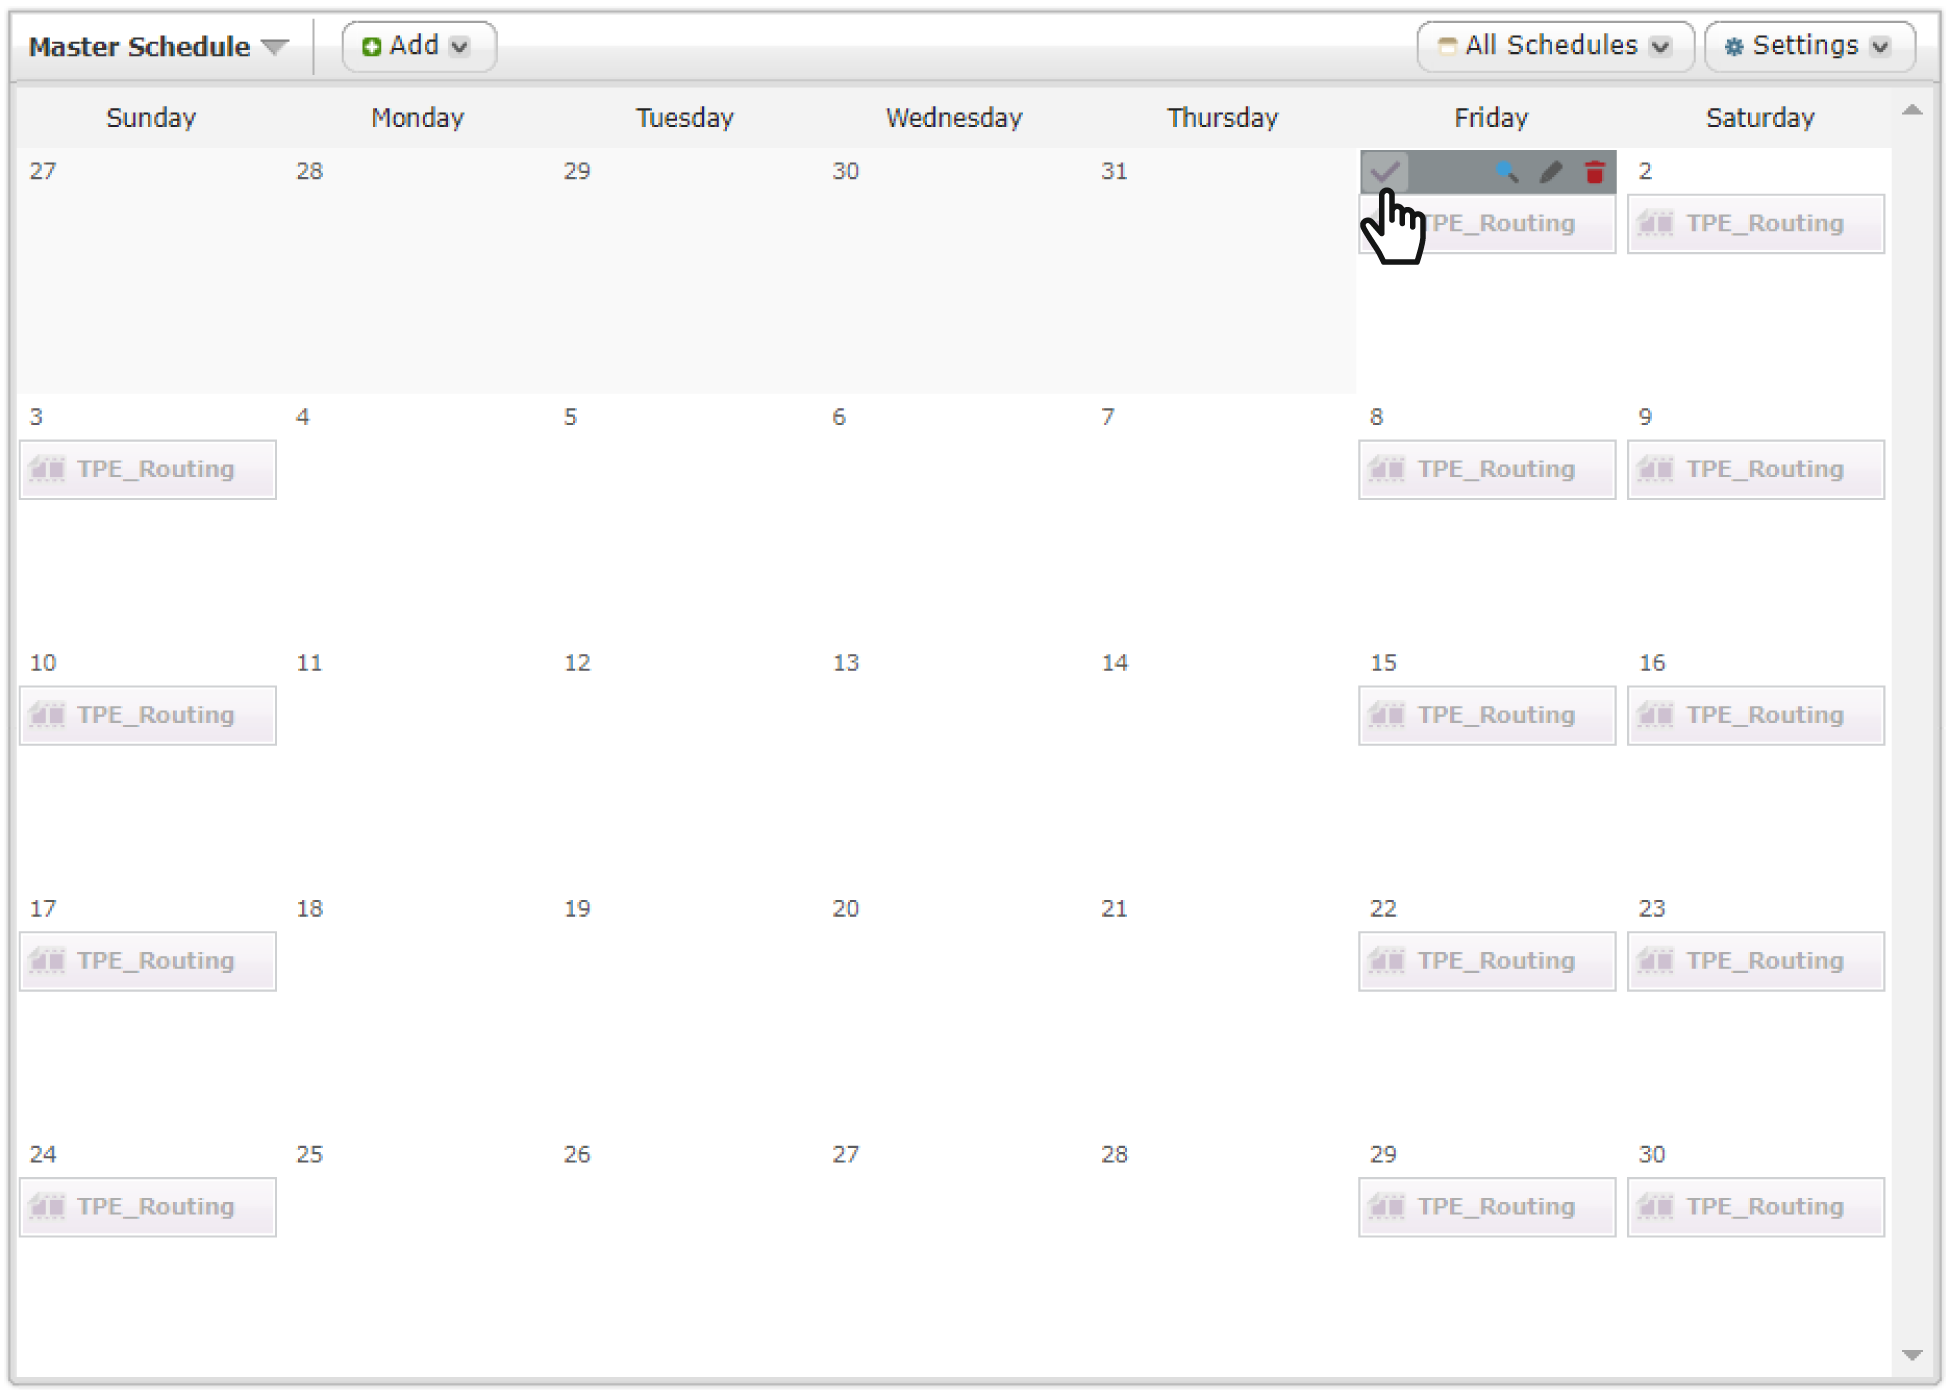
STEP 7 : Create a location-based campaign successfully
Click Save to create a scheduled task. Then you
can see
the scheduled task on the calendar or time list.
Please remember to click the enable button (from ![]() to
to ![]() ) to enable the scheduled task.
) to enable the scheduled task.